A beginner in Calisthenics practice should aim to do a total of 20 to 30 repetitions of pull-ups in a session practiced two to three times a week. The number of pull-ups needed and its distribution in sets will depend on your goal. 3 sets of 8 reps is a standard distribution for building muscles and 5 sets of 5 reps is for building strength.
But there is more to it rather than locking up yourself with a fixed number. The numbers, the version of pull-ups you are doing, and how you spread the reps in a session will depend on what type of beginner level you are in. Let us investigate further on which group you belong to.
As a general practice, doing a 3 sets of 8 reps routine with 60-90 seconds rest between sets is a good place to start to stimulate the muscles to grow. You can then progress to 3 sets of 9 reps, 3 sets of 10, and building up all the way to 3 sets of 15 repetitions.
But there is more to muscle building than just looking at these numbers. The key thing to consider is the intensity of the pull-up exercise you are doing. You want to make sure that you are on the point of rep failure in every set to stimulate muscle growth. One obvious way of adding intensity to the set is by doing more reps but there are other options to increase the intensity of your pull-up as well. Read this post I wrote on how to build more muscles with Pull-ups to see more options for the exercise.
You need to decrease the pull-up repetitions in the sets if strength gain is your goal. 5 sets of 5 reps that is highly recommended by Pavel Tsatsouline is a standard guideline. On average, 4 to 10 sets of 2 to 6 reps are being practiced by strength athletes. The range is very wide as this will depend on which stage of the training you are in. If you are close to your peak season, a very low rep count per set is the common practice.
The low rep count only defines a fraction of the real meaning. You need to make sure that the intensity is really high that you can really only do a low rep set, and at the same time, you need to rest three to five minutes in between sets. Here is my article about programming Calisthenics for strength.
If you are in this for the long haul, then that means serious business for you when doing pull-ups. The recommended numbers can vary from 30 to 100 pull-ups in a session. Yes, you read it right! You need to do lots of pull-ups in one stage of your calisthenics practice as a beginner. This is how Calisthenics athletes get really strong, by building very high-volume training.
But before you jump into just doing lots of pull-ups, it is good for you to understand strength training deeper as I assume that this will be your main goal for doing Calisthenics.
Here is a post I wrote about the things you need to consider in order to have a more effective Calisthenics strength program.
This will not be a problem if you can already do a few pull-ups in a row. You can either just work on a muscle-building pull-up program or a program biased towards strength depending on which stage you are in in your training. This should be enough for you to get ready for your event.
You may want to work on different types of surfaces or objects to hang on like walls and ropes as this will feel very different compared to regular bar pull-ups. It might be your grip and finger strength that will be the weakest link at the event.
The tricky one is if you cannot do one. Hopefully, you have enough time to prepare for the event to train for your first pull-up as it will take some time. Better to seek advice from an experienced Calisthenics instructor who does obstacle racing so you can get good guidance in your training.
This will be the most exciting, frustrating, and confusing stage to be in. Doing pull-ups is not as simple if you compare it with a typical biceps curl exercise where you can just grab a pink dumbbell and start counting. If it’s too easy then progress to a heavier one.
And it will be tempting to just ditch out this exercise because you can’t do it anyway. But there is actually a version of pull-up that you can do even if doing the standard one is not possible.
The leg-assisted pull-up is the go-to exercise that I teach in my Calisthenics class for beginners. Grab a box or bench so that your chin will be over the bar when you stand up. Do the pull-up movement but keep your feet on the box all the time and use your legs to assist you as you pull your body up. Make sure to use your leg only as much as your arms need to get your chin over the bar.
Doing this version will enable you to still do around 8 repetitions for 3 sets in your routine. Here is an article I wrote that will guide you step-by-step to achieve your first pull-up.
]]>To build muscles, you need to do between 8 to 15 reps for 3 to 5 sets of pull-ups done 2 to 3x per week. Building muscles through bodyweight movement will be dependent on the intensity of the exercises you are doing. You need to learn how to control the intensity of the work by tweaking either the load, reps, tempo, and rest time.
First, we need to understand that the main ingredient to building muscles is intensity. You need to make sure that you load the muscles with enough intensity to cause microscopic damage to the individual muscle fibers.
By the time you recover by taking enough protein and having a good night’s sleep, your body will repair the damaged muscle fibers and make them bigger so they will not tear the next time you load them. If you want to understand more about the mechanism of Muscle Hypertrophy, you can read this article from The Journal of Strength and Conditioning Research.
If you continuously do the cycle of loading, microtears, and repair, you will see a visible increase in the size of your muscles after a few months of training.
Here is an article where I cover deeper how Calisthenics exercises can build muscles.
Actually, you can achieve muscle hypertrophy by even doing more repetitions. You can see the physique of manual labor workers in the construction areas where they are lifting stuff daily for hours every day; they are doing very repetitive movements in a relatively low intensity but for very high repetitions. Hundreds of them daily, and you can see from the size of their forearms.
Now let’s go back to the pull-up exercise. The repetition is not the key here, but the intensity of the set. What the repetition does is to make sure that you finish the set with the right intensity. And what is the right intensity of the set? When your last rep is failing.
So it is not really the number of repetitions that influence the muscle growth stimulation; thus there is a wide rep range that is generally recommended. If you lock in your session with a number of reps, you may end up shortchanging yourself for that workout as you did not really reach the intensity of stimulating muscle hypertrophy.
A word of caution here is that even though you fail the rep, it is still understood that your form is not compromised. It can cause injuries if you push through a very awkward movement just to log in one more rep. In our Calisthenics classes, learning the movement correctly always comes first before pushing it to a harder intensity.
When you are strong enough to do 20 pull-ups, it is easy to load it so you can be on the ideal recommended rep range. You can either do a weighted pull-up variation in a Calisthenics gym where you have access to use a weight belt and plates or an asymmetrical pull-up that loads more to one side and then alternate to the other side the next rep.
But it is a big question if you cannot do a pull-up yet. The best way to do this is to do a band-assisted pull-up or a leg-assisted pull-up where you use your leg to assist you in doing your pull-ups. You will need a stool underneath your pull-up bar to do this version. Here is an article about how to modify your pull-up exercise if you cannot do one yet.
Once you know how to modify the load of your pull-up, you can find a load that you can do around 8 reps for a set to failure. You want to start on the lower end of the range so you will have room to increase the intensity by adding reps rather than changing the variation of your pull-up.
This question is applicable if you can do many pull-ups and don’t have access to weight belts and plates. Or you don’t want to do the asymmetrical progression of the exercise.
There are 3 ways you can modify the way you do your pull-up to achieve this:
1. Pause reps
You can pause on 2 to 3 points in your pull-up movement. This will dramatically increase the intensity of every rep, and you don’t have to do too many pull-ups to achieve the same results. For example, you start your pull-up in a passive hang. Instead of pulling all the way up, you pause where your elbows are at 90 degrees, then continue to pull to the highest point of your pull and pause, go back down, and pause again at the 90-degree angle.
2. Slower tempo
Slowing down the tempo or the speed of your movement will increase the intensity of the exercise. But where you slow down matters as well. The phase where you are lowering down in your pull-up (eccentric phase) is the best part to slow down as you can recruit more muscles at this part of the exercise.
According to this article, “a majority of studies seem to show that eccentric actions have the greatest effect on muscle development.”
3. Pulses on the last rep
If you plan to only do eight reps for whatever reason, you can do a few pulses on the last rep on the 2nd half of the pull-up movement to really drain the muscles. This will stimulate the muscles to grow further.
Tempo is the speed of how you do your pull-up. It is important as you can control the intensity of the exercise by controlling the tempo, and in addition to that, doing it at a specific tempo will require you to pay more attention to your movement and do it with better form.
A good tempo for doing pull-ups will be a fast speed going up and a slower speed going down of around 3 to 4 seconds. The fast speed on the upward phase of the pull-up will recruit more muscle fibers to do the same job and a slower speed going down will expose your muscles longer in the eccentric phase. This is an optimal way for muscle growth.
When you do a set of pull-ups to failure, you know that you are going to feel the burn on your forearms, biceps, and maybe your lats. This is called metabolic stress, where the lactic acid is building up, which is a reaction of the body after it has undergone a series of high-intensity repetitions.
The higher the metabolic stress, the more muscle growth effect it is for the body. But if you rest only for 30 seconds, your subsequent sets will be compromised, which will reduce the intensity of the exercise. A good recommended rest is between 60-90 seconds.
On the other hand, when you rest too long, you will lose the metabolic stress benefit induced by your previous set. This is ideal if you are using Calisthenics to train for strength but you don’t want to build more muscles.
]]>Calisthenics exercises are a very good option, especially as you don’t need to go to the gym to train, but sometimes you doubt if you can build muscles doing it when you are only lifting your own body.
Calisthenics training is very effective in building muscles, especially in the upper body and core area. The right amount of intensity in the exercises, good quality of sleep, and enough protein in your diet are important factors that affect the growth of muscle cells in your body also known as muscle Hypertrophy.
Let us understand first how muscles grow in general, what conditions you can create to enhance this effect, and we will cover what type of Calisthenics exercises best to do this.
According to an article from MedicalNewsToday; “Muscle size increases when a person continually challenges the muscles to deal with higher levels of resistance or weight. This process is known as muscle hypertrophy.”
When you expose your muscles to loads that are higher than usual, you are causing microscopic damage to the individual muscle fibers of that part of the body. Your body will then react by repairing the damaged tissue so it will not get damaged the next time you expose it to the same amount of load.
And if you continuously expose your body to higher loads every session, you will end up progressively building more muscles over time. This is provided that you gave your body enough time to repair before exposing it the next session.
It doesn’t matter whether you are lifting weights or just doing a bodyweight movement, if the intensity is enough to break some muscle tissue, you will stimulate the body to be in a hypertrophy state.
Here are 3 general factors that you need to consider to provide to your body for optimal muscle hypertrophy.
Intensity simply means how hard is the exercise you are doing. The harder the exercise, the more stimulation you send to the body to build more muscles. Here are 3 easy ways to add more intensity to an exercise:
a. The amount of load your muscles carry
This is the most common way in making an exercise harder especially if you are working out with weights as you can just add more plates onto the bar and you know that it is heavier.
But it is not that simple with bodyweight exercises as you only carry your own weight unless you do weighted Calisthenics in which you wear a belt so you can hang plates while you exercise. Other Calisthenics exercises such as front levers and planche will be more complicated as it uses the principle of leverage to control intensity. A few inches going forward or backward can greatly affect the amount of load.
So make sure you know the right progressions in doing Calisthenics exercise and pay attention to how your body positioning as this will greatly affect the intensity of the movement.
b. The muscles time under tension
This literally means the duration of time your muscle is tensing. The longer the time under tension, the more intense the exercise is. So if you are doing more reps, you have longer time under tension, assuming that the speed between reps remains constant. Another way of increasing the time under tension is by slowing down your movement or pausing somewhere within the range.
c. The eccentric phase of the movement can carry more load
The eccentric phase is the part of the movement where the muscles are lengthened as it is doing the movement. In general, it is the lowering part of the movement that the muscles will go into an eccentric contraction. For example, in push-ups, pull-ups, and dips, the eccentric phase is when you’re lowering down your body.
The eccentric part of the movement can carry more load than the concentric part (the shortening phase of the muscles or when you are going up) of the movement. This means that you have more capacity when you are going down than when you are going up.
Knowing this, you can add more load or add more time under tension when you are into the eccentric phase of the contraction. This is commonly demonstrated in bodybuilding where the spotter will help his partner lift the weight up then allow the partner to lower down the weights on their own when going down.
On top of this, not only eccentric contraction has more capacity to carry more, but the muscles will also undergo more damage microscopically when it is lengthened, which is a perfect condition to stimulate muscle growth. But there is a caveat to this as you will also need more time to recover. It is good for you to know this as you will be able to apply this knowledge later on to specific Calisthenics exercises.
If you want to read more on the nitty-gritties of what I am talking about, here is an article from The Journal of Strength and Conditioning Research.
Increasing the intensity of your exercise is only the first step towards muscle building. Your muscles will not grow if you are not allowing your body to recover before the next session. So here are the two important factors in recovery.
Once you are done with your intense training, your individual muscle fibers are damaged from the exercise. Your body is depleted with the energy it needs to repair. The most important thing you need to consider is what to eat to aid the body in repairing itself to build more muscles so you are ready for the next session.
Recommendations vary in terms of how much protein you need, the percentage of fat and carbs in your diet. But a good rule of thumb is to eat 1 gram of protein per pound of body weight per day. So if you are 150 lbs, you will need 150 grams of protein a day. Then you can fill in the fats and carbs accordingly.
If you are on the leaner side, you can keep or increase the number of carbs and fats that you normally take and see after 4 weeks if you are seeing results. If you are not building enough muscles, then you can increase your intake a little bit more.
If you are trying to lose fat, you can decrease the percentage of carbs and fats in your normal daily diet and check the results after 4 weeks. If you are building muscles and losing fat then you are on the right track, but if you are not getting leaner, then you may consider cutting the fats and carbs.
Best is to consult a dietician that is specialized in body transformation to aid you with this if you want to see faster and safer results.
You will need 6 to 8 hours of sleep to recover from an intense workout. Some individuals may need even more. Sleep is literally when the body will repair itself. All repair hormones like your growth hormone will be very active at this stage to rebuild all the damaged muscles from your workout.
You may need more than just a night’s sleep to get your muscles ready to do the exercise again if your recovery is slow or you really push yourself to the limit the previous session.
Based on the understanding of how muscles grow, we can conclude that any Calisthenics exercise can be used to build muscles. Of course, assuming you choose the right progression of the exercise depending on your level. But there are common practices that are best to achieve this. Let’s take a look at them.
Weighted Calisthenics
This is the simplest way to build more muscles in Calisthenics. You can add load to your dips, push-ups, pull-ups, and chin-ups. Planches and levers are a little more complex to add weight on, and besides, you have to be at a very advanced level before you can add weight to these exercises.
The drawback to weighted calisthenics is the setup. You will need weight belts and plates to do this method, which means you can most likely only conveniently do it in the gym.
Weighted Calisthenics is also a good way to build strength in Calisthenics. Here is an article I wrote about it.
Can high-volume training work to build muscles?
It can work if you do it right. Intensity is still the key, so you don’t just add reps for the sake of adding reps, but you add reps to increase the intensity of your sets. Doing 20 push-ups for 5 sets can be considered high-volume training, but it won’t stimulate muscle growth if you can actually do 30 push-ups for 5 sets.
Doing high-volume work is good especially if you’re doing your Calisthenics training at home where you don’t have access to the types of equipment that your Calisthenics gym provides.
One disadvantage in doing high-volume training is the amount of time it requires to finish the session. This is even worse the more advanced you are as you will need tons of reps to get you to the right intensity.
What is the best rep range for Calisthenics exercise?
Common knowledge of 8-12 or 10-15 reps is best for building muscles, but why are there too many variations of these rep ranges?
Your strength and capacity between sessions differ depending on your sleep, stress level, and recovery habits. Confining yourself into a certain number of repetitions will short-change your returns in building more muscles.
Intensity is the key, so if you still have more reps to go and you finish your set, then you are not stimulating your system enough to build muscles. But make sure you pay attention to your form, as pushing too hard with bad form can lead you to injury.
If you are still getting started, here is an article I wrote about how to do push-ups correctly.
What is the best tempo for building muscles?
Tempo is the timing of how you perform a movement. A simple way to describe it is to go slow, or go fast, or go fast up and slow down.
Since we know that the eccentric phase of the movement can carry more load than the concentric phase, we can optimize each rep to build muscles by controlling the tempo of the exercise.
Going fast up and going slow down will give you the best way to stimulate muscle growth as you increase the duration of the eccentric part, thus increasing the intensity. How slow do you go down? Around 4 seconds is a good start.
Adding pulses on the last rep
This is a good method to deploy if you don’t want to do too many reps. On the last rep, you can add small range pulses at the hardest part of the range. This will finish off your set with good intensity to stimulate muscle building without spending more time adding more reps.
For example, instead of doing 15 reps pull-ups, you can do 10 repetitions and add small pulses on your 10th rep. The number of pulses will depend on the reserve you have left.
How long do you need to rest in between sets?
Rest time can vary from 30 seconds to 5 minutes between sets. In general, you rest longer when you want to build strength and shorter when you want to build more muscles. This leads us to the conclusion that 30 seconds is the best rest time!
But not so, as resting too short will not help you recover for the next set, which will compromise on how intense you can do it. Remember, high intensity is also a significant factor in muscle hypertrophy. 60 to 90 seconds, in general, is a good rest time to effectively build muscles.
]]>Here are the 12 things that we need to consider in building a strength training program for our Calisthenics practice:
The very first step that you need to undertake before going straight into a training program is knowing where you are in relation to where you want to be.
“A map will not be able to give you direction unless you know where you are.”
In terms of fitness in general, there are 2 common variables to knowing your level.
This is very true especially training in the gym, but it is a little bit more complicated when you are doing bodyweight training as you cannot just increase your weight to increase the intensity of the exercise except when doing weighted calisthenics. Some bodyweight movements use the lever advantages to increase and decrease the intensity. You may have to look at your physics book to read on torques and fulcrums again to understand these mechanics.
Let’s look at the front lever exercise, for example:
The intensity is at the lowest when your legs are tucked close to your chest, and it will be at its hardest when your legs are fully straightened.
So make sure you assess your level first before starting your training. The help of an experienced Calisthenics teacher will be very valuable, especially if you are very new to the training. It is a common practice in our Calisthenics class to see the current level of our new students so we can give them the right variation of the exercises.
After you have established the level where you are at, you want to make sure you have learned the standards of the movement you will tackle.
One of the most common causes of injury is doing the movement with bad form. This will unnecessarily stress the joints and ligaments wrongly.
It can result in you compensating when you push harder, creating muscle imbalances instead of getting stronger.
Once you have found the right level you are in and have already studied the movements you are going to tackle, the safest way to start your training is to slowly accumulate volume.
Volume in strength training means the total number of repetitions you are doing in relation to time (in a session, week, or month).
I will illustrate it in a linear progression to make it easier for you to understand but bear in mind that it rarely works this way in practical application.
Number of reps |
Number of sets |
Total daily volume |
|
Week 1 |
12 reps |
3 sets |
36 |
Week 2 |
13 reps |
3 sets |
39 |
Week 3 |
14 reps |
3 sets |
42 |
Week 4 |
15 reps |
3 sets |
45 |
The table above illustrates changing the number of reps, but you can also adjust the number of sets to control the volume of your training. The important thing to remember is a gradual increase in the total volume.
Since you are increasing your volume gradually in this stage, it is important to take note that you don’t increase the intensity of your exercise. In fact, you want to make sure that you are doing a less intense version of the movement where you can do around 15 to 20 reps range.
Why is it important to accumulate the volume when you’re building strength?
Like a pyramid, you can only go higher if your base is wider. It’s the same in training; you will not be able to achieve a high level of strength if you don’t spend time building your base.
There is an overlap between building muscle and accumulating your volume, but the rep range is the main difference. Though the accumulation stage will also build muscles, the main goal is to increase endurance and strengthen the ligaments and tendons in your joints to prepare it for heavy loading once you progress with your training program.
According to Brad Schoenfeld’s article:
“For a variety of reasons, a moderate-repetition scheme (approximately 8 to 10 repetitions per set) is the decidedly better choice for achieving optimal gains in muscular mass.”
The CNS or Central Nervous System is, in simple terms, the wires from your brain to your muscles. In a regular effort where you feel the pump in your muscles, you only use a percentage of the muscles that can do the task. Lesser wires are activated.
So that means you actually have more potential to do a more advanced movement but your body is not able to access these unused muscles unless you really push your body to the limit.
A typical rep range for training to stimulate the CNS is between 2-6 repetitions. This type of training will not build muscles because of the low volume, but it is the most effective way to train your strength.
You must be working with good form when doing exercises as the load is very high that you are at risk of getting injured. Doing the volume and hypertrophy phases will prepare you for this stage.
Once you reach the level where you are working on advanced movement or a very high load, the rest time should be longer in between sets.
Here is a table of rest time between sets, number of sets, rep range, and the training phase you are in.
Volume or accumulation phase |
Hypertrophy phase |
High-intensity phase |
|
Rep range |
15-30 |
8-12 |
2-6 |
No. of sets |
3-6 |
3-6 |
3-4 |
Rest between sets |
1 minute or less |
2-3 minutes |
4-5 minutes |
Intensity |
Very low |
Low |
High |
Disclaimer: The data in this table is a concise summary of extensive variations in the training methods. I have gathered this from various reliable information to make it simpler for you. Suppose you want to read the extensive studies and more in-depth articles. In that case, you can read my sources here: “Defying Periodization” by Jim Stoppani and “Five Steps to Increasing the Effectiveness of Your Strength Training Program” by Charles Poliquin.
A circuit training is a type of workout where you set up multiple stations. You will do different exercises at each station, and the rest times between stations can be quite short.
This type of training is very effective to burn fats, improve your conditioning and build volume overall but it comes short in building real strength. One of the main reasons is its short rest time and the multiple movement variations in a circuit. It is not possible to place a pure strength-building movement in one of the stations without compromising the quality.
You may be able to do it well on the first round, but as you fatigue from the other exercises, the quality of the movement will be compromised in the coming rounds so is your strength gains.
You are better off doing a more focused program where you do the hardest movement first, finish all the sets, then followed by a not-so-hard one, and then end your session with the easiest movement.
A beginner workout example will be:
Exercise 1 Pull-ups - 4 sets of 3 repetitions with 4 minutes rest
Exercise 2 Parallel bar dips - 4 sets of 3 repetitions with 4 minutes rest
Exercise 3 Ring rows - 3 sets of 15 repetitions with 1-minute rest
Exercise 4 Push-ups - 3 sets of 15 repetitions with 1-minute rest
Make sure you finish all the sets of exercise 1 before you proceed to exercise 2. This type of training can be time-consuming because of the rest time between the sets, but it is also very effective in building strength.
Another thing that you have to consider when working on improving your strength is not to be too greedy with your goals. Unless you are a professional athlete that can burn 5 hours daily in your training.
If you have more goals than the number of hands you have, it is very likely that you can’t hold on to them.
Focus on one or two goals at a time and put all your energy into it. And in bodyweight exercises, there is a very high transferability between one movement to the other, especially if you know the progressions of the exercises. In my Calisthenics classes, we focus on a series of progressions as our short-term goals. This will keep us motivated as the goals are not too far out of our reach.
Calisthenics training can be very challenging to progress because the intensity gap between the progressions can be quite big or vague. For example, a tuck planche to an advance tuck planche can be a very tricky situation to bridge.
One solution to build strength in Calisthenics is to do loaded bodyweight exercises.
This can be done by wearing a weighted vest or a belt to hang regular plates into it. This will make your workout progression more linear, just like working in the gym. It doesn’t apply to all movements, but it works very well with Dips, Push-ups, Pull-ups, and Chin-ups
You don’t get stronger in the session; you are getting weaker as the session progresses. You will only gain strength the next day once you replenish the energy that you have spent in training and when you give your body a chance to recover.
Here are some recovery methods that you can work on if you really want to bring your strength to the next level.
when exposed to contrasting temperatures will increase your sore muscles’ circulation, eliminate toxins, decrease inflammation, and increase the Growth Hormone. That means faster recovery.
Working on your mobility will also improve your movement pattern, which will enhance the effectiveness of your workout in the next session.
According to the Human Kinetics Journal’s article about the “Effects of Exercise on Dietary Protein Requirements,” that those involved in strength training might need to consume as much as 1.6 to 1.7 g protein ⋅ kg−1 day−1 (approximately twice the current recommended daily allowance).
Aside from a higher protein intake, a cleaner diet of fewer junk foods and free from preservatives would always be a good thing.
According to the book “Essentials of Strength Training and Conditioning” by the US National Strength and Conditioning Association that Long-term heavy resistance training brings about significant adaptive responses that result in enhanced size, strength, and power of trained musculature.
Building strength is not gonna come fast and easy. So expect some serious time commitment to work on it. It is going to take years of consistent training to get you to an advanced level of strength.
If you are just getting started with Calisthenics, here are some of my articles that you might want to read:
Wrist warm-up for CallisthenicsA Strength Pilates mat class is a hybrid class designed to build strength using Pilates and bodyweight exercises. It gradually progresses the attendees from building a good foundation in fitness using Pilates to developing more strength with Calisthenics training.
Before we see how Calisthenics training and Pilates method blend well, we will first look at them individually.
Though Bodyweight training is pretty simple and accessible as you barely need any equipment to do the exercises, most fitness enthusiasts still struggle with common bodyweight movements like push-ups and pull-ups.
Many new students attend our Calisthenics classes who have been doing High-Intensity training for months and still struggle with the standard push-ups on the floor. This is very intriguing if you consider that the push-up exercise is also done in their High-intensity sessions as well.
Here is a list of common struggles that first-timers attending a Bodyweight training class and let’s validate them one by one:
This is actually a very valid concern, especially if you always struggle with gaining the strength to do basic movements like floor push-ups. At our Calisthenics Fundamentals class for beginners, you will be guided with the correct version of the specific exercise that suits your level to be your starting point. So, you are never too weak for the class; you are just doing a different version of the exercise.
To know more about how we teach the basic exercises, here are the 2 articles I wrote about the progressions of the Push-up and Pull-up exercises.
It’s either you get inspired, or you get intimidated observing a Calisthenics class. At our Calisthenics gym in Singapore, you will most likely get inspired by looking at the students who are in their 50s and 60s. They come from training in our Pilates classes which guided them safely in building their foundation.
A lot of people will back off when we tell them that it will take years to learn handstands or more than 6 months to get their first pull-up. With almost every aspect of our life sped up from the advancement of technology, people are more impatient to achieve their fitness goals. Unfortunately, unlike computers, our body still contains the same hardware that was built thousands of years back, and it will take time to work on it.
Beginners and even some advanced Calisthenics practitioners can do well if they work a little more in their body awareness. Since Calisthenics is known for its “Reps and Sets” style of training, it will miss the element of refining the move first before doing more.
Pilates is actually Bodyweight training, especially if you are doing mostly Pilates Mat classes. You can read my article to understand more about Bodyweight training here. But it is not very uncommon for a Pilates enthusiast to not like Calisthenics training.
Pilates has a very gentle approach in training; exercises are done with fewer reps and is a very low impact method of workout. That is why it is very good for rehabilitation. But if you want to progress further, the training approach has to change, and every now and then, you can add intensity or volume (repetitions) to your training.
Pilates is a very refined method of training where details are taken into account in very small movements over your entire body. From the position of your toes to how you hold your head up matters in a Pilates session.
You will get stronger doing Pilates, especially in the core area, but the upper body will need more training than just doing only Pilates. Doing just a single pull-up or doing a good push-up on the floor can still be challenging for someone who has been doing Pilates for years.
One of the most common concerns among women. Your muscles will not just pop out like magic as you wake up one morning; it takes time to build muscles, especially for ladies.
Doing bodyweight training will get your muscles toned and leaner, but getting bulky will be very unlikely unless you take some supplements to increase the male hormones in your body.
Pilates and Calisthenics training have their own advantages and limitations, which can highly complement each other. This is one of the reasons why we started mixing them together in our Pilates studio.
Pilates to start your fitness routine
Pilates is an excellent approach to building a foundation for those starting their fitness journey, especially for older adults who are stuck in front of the computer desks for a few decades already.
This situation actually does not begin when you start working in the office, but from when you started to sit down in school for more than 6 hours a day. Your body has slowly lost its capacity to move.
Pilates training works very well in improving your body awareness, overall strength, and flexibility; thus, it is a safe place to start getting fit again. You can read my article on how a beginner should approach Pilates training to learn it faster.
Calisthenics training to stimulate your body further
Once you have built enough foundation in your fitness in Pilates training, Calisthenics will develop your strength further, so you have more capacity to move your body freely.
Strength training in Pilates class
Our Strength Pilates mat class is a blend of Pilates and Calisthenics training. It makes it very suitable for beginners who are just getting started or Pilates practitioners who plan to advance their work in Calisthenics training.
If you want to try our classes, we offer a 3 session introductory package. Hope to see you in the studio soon.
]]>It is very common to hear from most fitness enthusiasts that it is not possible to train your legs with just bodyweight exercises. The main reason being is that you will need to carry weights to stimulate your leg muscles to grow and get stronger. This may be true if you are an elite athlete that would require a double bodyweight squat to progress, but for mere mortals like us, doing Calisthenics leg exercises will be enough to keep our legs lean and strong.
As a general rule, you start doing bodyweight squats to strengthen the front of your legs in your Calisthenics training. You then gradually progress to split squats and side squats to strengthen it further. As for the back muscles of your thighs, shoulder bridges and hip hinges will be good options to start.
Here is a list of Calisthenics leg exercises which we teach on our Calisthenics Fundamentals class, that a beginner can start with.
The foundation of all leg exercises. One of the biggest mistakes that a fitness practitioner makes, including advanced practitioners, is that they start loading their squat with heavy plates on the barbell without really working on the basic bodyweight squat movement.
Benefits
Stand with your feet around shoulder-width apart and feet pointing forward or diagonally outwards. Bend your knees until your all the way to the bottom of the squat. Your buttocks should only be a few inches away from the floor. Keep your upper body relatively upright throughout the movement with a slight lean to the front at the bottom. Push back up to the standing position.
As you go up and down the movement, make sure your knees are pointing in the same direction as your toes and not caving inside to avoid any additional strain in your knees.
If you are having a hard time keeping your body upright and you are falling backward as you are going down, most likely, your ankles are tight. You can do a quick fix by elevating your heels with a weight plate or books of the same height. The higher you elevate your heels, the easier it will be for you to stay upright and go lower.
Benefits:
Start by placing one foot in front around 2 to 3 feet away from your back foot. Slowly bend your front leg and keep going down until you reach the bottom of the movement. Try to keep your back upright and your back leg almost straight with the back knee close to the floor. Push strongly with the front leg to go back up to repeat the movement. Change side only after you finish your planned repetition.
Here are a few things to take note of when you are at the bottom of the movement, as this will be a key ingredient to get all the benefits of doing split squats
Keep your body upright and not leaning forward. And try to contract the buttocks of the back leg. You should feel a good stretch on the hip and front thigh area of the back leg as you do so.
Benefits
Start standing with your legs wider than shoulder-width apart and feet pointing diagonally to the sides. The wider your stance is, the more stretch you will feel from the hips and inner thighs. Start somewhere comfortable where you can comfortably learn the exercise and progress from there.
Slowly go down to a squat position with your knees pointing outside and aiming to bring your hips at the same level as your knees. Make sure your knees are pointing in the same direction as your toes, and keep your body as upright as possible.
Come back up to your starting position and repeat. Aim to go lower with your squat, and hold at the bottom position for up to 30s on the last repetition.
To get stronger in the bottom position and to work more in opening your hips further, try pushing the knees to the side as far as you can. You can use your hands to assist this movement by pushing the inside of your knees. Repeat this movement for reps.
Here is my video in YouTube you can refer for the wide squats.
Benefits:
Stand with your feet shoulder-width apart and slowly bend down forward while keeping your entire spine straight. Make sure to move by hinging your hips and not rounding the spine. Slowly go back up to starting position to repeat the movement.
Aim on going down until your back is horizontal. If you are having a hard time going down without rounding your spine, try to bend your knees slightly. You can slowly straighten your knees over time as you get more flexible.
Benefits:
Start with your back on the mat, with your knees bent and feet close to your buttocks. Lift your back off the floor, initiating the movement by pressing the feet downwards. Curl your spine from your tailbone as you lift upwards. This will lift your buttocks off the floor first, followed by your lower back, then middle back, and last will be your upper back. This will teach you to articulate the spine, which will benefit the individual joints between vertebrae. The shoulder bridge exercise can also be done with a straight back which will focus more on the buttocks muscles. But regardless of which version you're doing, make sure you tuck your tailbone and tighten up your butt muscles.
As you're lowering down, try to even focus more on articulating your spine. So, you lower your upper back first, followed by the middle back, lower back, and your tailbone should be the last to touch the floor.
Here's a short tutorial on how to do a shoulder bridge:
Yes, you can do legs daily as your legs can take more load regularly. Sprinkle your work week with some light intensity on some days and some medium to high intensity on other days. Just bear in mind that you may feel quite fatigued on some days, and you can always take a day off or two. If you don't have the luxury of working with your legs daily, a good frequency is to do it 2x per week.
Start with 10 repetitions, and you can work up to 30 reps of some of the movements. If you find that the exercise is too hard for you, start with around 10 repetitions or whatever you can manage, then slowly progress from there. Just make sure you don't compromise your form doing the movement when pushing into high reps.
Not necessarily. A good minimum combination to start is to select one movement that will work more on the hamstrings and pair it with a movement that will work more on the quads.
This will give you a balanced development in your lower body.
]]>As a whole, you can classify all Calisthenics movements to be bodyweight exercises but not all bodyweight exercises can be considered Calisthenics. For example, a regular Yoga class can be a type of Bodyweight training as it only uses body weight for resistance but the attendees are not doing Calisthenics exercises.
Let us discuss deeper onto these terms so we can understand them better.
Bodyweight exercises cover a broader topic of different types of training that only uses your body weight to complete the movements. This makes it a very minimal approach to fitness training as you will not rely on any equipment.
It is very convenient to do anywhere while you are on vacation, at home, or in the office as long as you have the required space for your exercises. If you learn the exercises properly, you will be able to achieve just as good results as equipment-based training.
The list can be long if we include all the types of bodyweight training, but to give you a better picture, we will list the most common ones you can find in the industry.
And the list can go on and on...
As long as the method of training only uses the bodyweight to develop strength, one can already argue that it is a type of bodyweight training.
Though it is a very grey area where to demarcate the boundary to what are the pure Calisthenics exercises, especially when you relate it with Gymnastic training, there are specific movements that are silently agreed from the Calisthenics community to belong to Calisthenics training method only.
These exercises are:
There will be many more variations of the list above but if you actually look at it closely, gymnast does all these exercises in their training as well.
One question that is very debatable to answer, as almost all if not all of the Calisthenics exercises are covered in Gymnastic training in one way or another. The only difference here is the way they approach these exercises and the end goal of the training.
In Gymnastic training, the Calisthenics exercises are just drills to achieve another higher-level Gymnastic move. In Calisthenics training, these exercises can be the goal in itself.
For example, the pull-up exercise for gymnasts is a preparatory exercise for their Gymnastic ring routine, but in Calisthenics, doing the pull-up exercise can be a competition in itself.
Though it is commonly described as a bodyweight exercise, high-level practitioners will need more challenges to progress further. So they will include weights in their Calisthenics exercises to create more resistance.
These additional weights come in weighted vests, ankle weights, or common gym plates or kettlebells attached to a weight belt.
As a general rule, considering that you use your body weight to resist the movement, lighter practitioners will find it easier doing Calisthenics movements. Though this is not a hard and fixed rule as some individuals who are very light can also have very low muscle composition and a higher percentage of fat, which makes them relatively weaker in relation to their weight.
You can do Calisthenics training at any weight. You might be struggling to do the common Calisthenics exercises at first, but if you know the regressions of the exercises, you can safely progress in your Calisthenics training without getting overstrained. Here is an article I wrote about getting started with Calisthenics. Enjoy the journey.
]]>A Calisthenics home exercise routine will be one of the best options for the time being as you don’t need any equipment. So how effective is it to lose weight with Bodyweight training?
Calisthenics Training is a very effective method to lose weight. On average, a 75kg (165lb) adult can burn 600 calories in 60 minutes, exerting a vigorous effort of Calisthenics exercises. This makes it just as effective as high-intensity Circuit Training done at the same duration.
Let’s go deeper into the topic where you can compare the different exercise routines and how many calories they burn so you will have a better idea for your exercise of choice to effectively lose weight.
I have done thorough research to compare some of the common exercise routines and activities that we do at home and how many calories they burn in a 60-minute session.
I made these tables so it is easy for you to view based on your weight and which activity you are doing. I have derived my calculation based on this Metabolic Calculator by Metscalutor.com.
Weight |
Sitting Quietly (General) |
Cooking or Food Prepartion |
Walking for exercise at 5.6 kph (3.5 mph) |
50-55 kg (110-121 lbs) |
65-71.5 kcals | 100-110 kcals | 215-236.5 kcals |
55-60 kg (121-132 lbs) |
71.5-78 kcals | 110-120 kcals | 236.5-258 kcals |
60-65 kg (132-143 lbs) |
78-84.5 kcals | 120-130 kcals | 258-279.5 kcals |
65-70 kg (143-154 lbs) |
84.5-91 kcals | 130-140 kcals | 279.5-301 kcals |
70-75 kg (154-165 lbs) |
91-97.5 kcals | 140-150 kcals | 301-322.5 kcals |
75-80 kg (165-176 lbs) |
97.5-104 kcals | 150-160 kcals | 322.5-344 kcals |
80-85 kg (176-187 lbs) |
104-110.5 kcals | 160-170 kcals | 344-365.5 kcals |
85-90 kg (187-198 lbs) |
110.5-117 kcals | 170-180 kcals | 365.5-387 kcals |
90-95 kg (198-209 lbs) |
117-123.5 kcals | 180-190 kcals | 387-408.5 kcals |
95-100 kg (209-220 lbs) |
123.5-130 kcals | 190-200 kcals | 408.5-430 kcals |
Weight |
Calisthenics Training Moderate effort (60 min) |
General Pilates (60 min) |
Sationary Cycling light to mederate effort (60 min) |
Hatha Yoga (60 min) |
50-55 kg (110-121 lbs) |
190-209 kcals | 150-165 kcals | 240-264 kcals | 125-137.5 kcals |
55-60 kg (121-132 lbs) |
209-228 kcals | 165-180 kcals | 264-288 kcals | 137.5-150 kcals |
60-65 kg (132-143 lbs) |
228-247 kcals | 180-195 kcals | 288-312 kcals | 150-162 kcals |
65-70 kg (143-154 lbs) |
247-266 kcals | 195-210 kcals | 312-336 kcals | 162-175 kcals |
70-75 kg (154-165 lbs) |
266-285 kcals | 210-225 kcals | 336-360 kcals | 175-187.5 kcals |
75-80 kg (165-176 lbs) |
285-304 kcals | 225-240 kcals | 360-384 kcals | 187.5-200 kcals |
80-85 kg (176-187 lbs) |
304-323 kcals | 240-255 kcals | 384-408 kcals | 200-212.5 kcals |
85-90 kg (187-198 lbs) |
323-342 kcals | 255-270 kcals | 408-432 kcals | 212.5-225 kcals |
90-95 kg (198-209 lbs) |
342-361 kcals | 270-285 kcals | 432-456 kcals | 225-237.5 kcals |
95-100 kg (209-220 lbs) |
361-380 kcals | 285-300 kcals | 456-480 kcals | 237.5-250 kcals |
Weight |
Calisthenics Training Vigorous effort (60 min) |
Circuit training Moderate effort (60 min) |
Circuit Training Vigorous effort |
Weight Training (With multiple exercises at 8-15 reps) |
50-55 kg (110-121 lbs) |
400-440 kcals | 215-236.5 kcal | 400-440 kcals | 175-192.5 kcals |
55-60 kg (121-132 lbs) |
440-480 kcals | 236.5-258 kcal | 440-480 kcals | 192.5-210 kcals |
60-65 kg (132-143 lbs) |
480-520 kcals | 258-279.5 kcal | 480-520 kcals | 210-227.5 kcals |
65-70 kg (143-154 lbs) |
520-560 kcals | 279.5-301 kcal | 520-560 kcals | 227.5-245 kcals |
70-75 kg (154-165 lbs) |
560-600 kcals | 301-322.5 kcal | 560-600 kcals | 245-262.5 kcals |
75-80 kg (165-176 lbs) |
600-640 kcals | 322.5-344 kcal | 600-640 kcals | 262.5-280 kcals |
80-85 kg (176-187 lbs) |
640-680 kcals | 344-365.5 kcal | 640-680 kcals | 280-297.5 kcals |
85-90 kg (187-198 lbs) |
680-720 kcals | 365.5-387 kcal | 680-720 kcals | 297.5-315 kcals |
90-95 kg (198-209 lbs) |
720-760 kcals | 387-408.5 kcal | 720-760 kcals | 315-332.5 kcals |
95-100 kg (209-220 lbs) |
760-800 kcals | 408.5-430 kcal | 760-800 kcals | 332.5-350 kcals |
Based on the table above, doing Vigorous Calisthenics training will burn just as many calories as High-intensity Circuit training in the same duration. Even a moderate effort in Calisthenics training burns more calories than a general weight training routine, which is a big surprise.
Considering that you don’t need any equipment to do Calisthenics exercises, it is definitely a much better option than exercise activities requiring you to be in a fitness center.
Suppose you only consider the number of calories burnt in a certain period. In that case, we know that High-Intensity Circuit training and vigorous Calisthenics training will be the best choice. Still, you may have to consider a couple of things when selecting your exercise routine.
This article from PubMed says that high-intensity exercises are better than moderate-intensity exercise for weight loss but there is decreases adherence to the routine and less completion of the exercises. We know that losing weight will not be a short journey, so you need to make sure you can sustain your weight loss routine and not give up halfway.
In that case, it may not be a good idea to rely solely on a high-intensity type of training. A good combination of moderate exercise done more frequently plus a couple of intense workouts evenly spread in the week might be a good option. According to Jama Internal Medicine’s article, even with diet’s absence, overweight subjects will still benefit a lot from doing light to moderate exercise.
One of the best ways to start an exercise program is to know your current level first and go through a self-education process by learning how to do the exercises properly. Of course, this will be best done with the guidance of a good coach, but if you are in it for the long haul, it will be better to gradually go into an exercise program where you learn how to do it yourself safely and know when to progress without overstraining yourself physically and mentally.
I wrote an article about learning the push-up properly by knowing which progression you should be doing first. Even if you are a beginner and slightly overweight, you will always have a version of doing push-ups. If you want to read more, you can click here.
Calisthenics exercises are mostly compound exercises which means they involve more muscles to complete a certain movement. More muscles working at a given time leads to higher energy consumption than equipment-dependent exercises commonly done in a gym that works on isolated muscles.
A good example is a bicep curl to work on the upper arm muscles. You can do this movement seated or standing still, which requires less contraction of the other muscles of your body. Whereas in Calisthenics, your option could be doing incline rows or chin-ups depending on your level. Both will require you to contract the biceps and your lats and your entire body fully, so your body will stay rigid the whole process.
As a whole, Calisthenics exercises are safe as long as you follow a good routine that is suited to your level. It is hard to go wrong doing a beginner’s exercise routine where you do push-ups, ring rows, bodyweight squats, jumping jacks, planks, and core exercises done on the floor.
If you compare it to equipment-based training where one has to make sure the machine is properly set up, and one has to learn how to use it properly. There is just a higher chance of making a mistake in this kind of setting.
"It’s no secret that the amount of calories people eat and drink has a direct impact on their weight: Consume the same number of calories that the body burns over time, and weight stays stable. Consume more than the body burns, weight goes up. Less, weight goes down." according to this article by Harvard T.H. Chan
To simplify it for you, I have gathered a few common meals and food that all of us recognize and create at a table of how much calories do these meals contain. I used WebMD food calculator to gather the data. If you want to know more about other food, you can follow this link. Then you can compare it with the exercise of choice you available in the table above and you will have a good estimate on what is going in to your body and how much energy you are burning.
Bear in mind that diet is a deep topic that is beyond my capacity to write in this article. Not only the calories you consume, but the quality of the food that you are taking will also matter not just for weight loss but also to be healthy in general. Best is to consult a Medical professional when seeking advise for you diet especially if you have an underlying health condition.
Food | Calories | Fat | Protein | Carbs |
Meal, chicken, breast, herb roasted, w/potatoes & veg, frzn, Lean Cuisine |
180 kcal | 4 g | 18 g | 20 g |
Meal, beef, oven roasted, w/broccoli & cheese sauce, frzn, Lean Cuisine |
210 kcal | 8 g | 16 g | 18 g |
2 pieces of medium size (3") fresh Apples |
189 kcal | 1 g | 1 g | 50 g |
2 pieces of 8 1/4" long fresh Cucumber with skin |
90 kcal | 1 g | 4 g | 22 g |
Salad, Caesar, w/grilled chicken, premium, McDonald's |
220 kcal | 6 g | 30 g | 12 g |
Double Cheeseburger McDonald's |
440 kcal | 23 g | 25 g | 34 g |
QuarterPounder Double Cheeseburger McDonald's |
740 kcal | 42 g | 40 g | 48 g |
In conclusion, as long as you watch how many calories going in to your diet, Calisthenics training done a few times a week is a very good option for a weight loss routine. It burns as many calories as high-intensity circuit training do and you can easily do it at home. Mix it up with moderate walking exercise on your rest days and make sure you are consistent then you'll get the best result.
]]>Generally, the cost of a Calisthenics class in Singapore ranges from $10-$150. The price difference can vary significantly from a group class or personal training. A group class averages around $25 per session.
Keep reading below to learn more about the factors you need to consider when attending a Calisthenics class.
Hiring a one-to-one coach for your Calisthenics training will cost you a lot more compared to just attending a group class. So, is it really worth getting one?
Let's look at what you need in a session:
To progress faster, the exercises have to be suited according to your level. Depending on the size, some group classes will modify the exercises accordingly, whereas, in a Personal training session, you will get full customization of the exercises.
Winner: Personal training
A group session is generally fixed in a certain timing compared to full flexibility for a one-to-one session. At UMove Fitness Singapore, we don't accept payments for private training sessions unless we can match the compatibility of our teachers time and our students preferred timing.
Winner: Personal training
This one depends on you if you prefer a more private training class or you prefer to work in a community where you get motivated and inspired to do your training.
Winner: Group class
The trainer has to look after more people in a bigger class, which will limit the teacher's time to correct your form and watch out for your safety. You will have 100% attention from your coach in private training.
Winner: Personal training
Calisthenics is a skill-based training approach, and it will take time to achieve the skills that you aim for. The more accountable you are with your own training, the faster you can progress. Since you are left on your own in a group class to do your exercises, you will develop a good level of accountability compared to a personal training session where you are fully dependent on your coach.
Winner: Group class
Here is a table of comparisons between both classes:
Group Class |
Personal Training |
|
Price range |
$10-$50 per session |
$60-$150 per session |
Customization |
none |
Full customization to your level |
Schedule |
Fixed |
Full flexibility |
Social benefit |
High |
Low |
Safety and injury prevention |
Low |
High |
Motivation and inspiration |
High |
Depends on the trainer |
Attention from your trainer |
Partial attention - depending on the size of the class |
100 percent |
Accountability |
Full accountability |
Creates dependency |
Faster progression/Results |
Slow |
Faster |
Recommendation: If safety is your first priority and you want to progress faster and afford the cost, personal training should be your first option. Just make sure you stay accountable to learning, and really owning the exercise as dependency on your personal trainer can hinder your progress.
This is probably the best approach to training and learning in general. Take advantage of the full guidance of your coach in a personal training session to learn the movements properly. Then you can attend group classes safely and learn to be accountable for doing your own exercises properly.
We offer a 3-session Group Introductory package here, where you can meet our team personally and experience our small-sized group classes. Once you have tried us out, you can decide to either stay in the group or progress towards personal training sessions to customize your program.
Outdoor is always my first choice if I practice Calisthenics, but the main drawback is the weather. Especially here in Singapore, where it is very humid all year round, and it is also not practical to train outside in the rainy season. Outdoor group classes can be canceled last minute due to weather changes, affecting your practice's consistency.
One big advantage of doing Calisthenics class indoors, especially for beginners, is the accessibility of these small pieces of equipment. Most likely, you will need boxes, elastic bands, stools, parallettes, stall bars, and more items to assist you with the exercises.
In general, indoor classes will be more costly compared to outdoor classes as you have to factor in the utility bills, admin, and rental cost into the pricing.
Calisthenics exercises might look very simple and straightforward as it only requires body weight as the resistance of the exercises. It is very easy to attempt advanced movement as it is readily accessible to anyone just getting started with Calisthenics. All you need is the floor or a pull-up bar to try it out, which can cause serious injury.
You will need a coach with at least 5 years of experience in teaching, with qualifications to teach Calisthenics and preferably more matured to guide you with the exercises. Calisthenics and fitness, in general, is a long-term lifestyle commitment, and time is the best teacher for the coaches to learn how to best teach the method.
An experienced coach with a variety of qualifications in rehabilitation and other types of training methods will charge more for the session, but the premium guidance and teaching you will get will be worth it.
This is even more important if you are a beginner with a lot of aches and pains in your body or if you are over 30 years old. You will need a more systematic progression with the exercises as your body is a little slow to progress and, at the same time, a little more vulnerable to strain and injuries.
"You just don't want to be your coach's first Guinea pig in his fresh teaching career."
Experienced teachers can always handle a bigger group without losing the quality of the teaching, so first, you need to go to the right coach that can guide you well. But no matter how good the teacher is, if there are 30 people in the group, it will become a monkey-see-monkey-do class. The quality of the session will be greatly compromised, and so goes your progress and safety.
A group class with a smaller size will be more costly, but the price will be worth it in exchange for the safety you will get.
Though Calisthenics exercises don't require that much equipment, you may need some accessories to help you learn the exercises faster. Investing in these pieces of equipment can add up to the cost of the session. And also, a more qualified coach is needed to handle the group training.
So perfect scenario for you will be finding an indoor Calisthenics class that has a maximum group size of 10 people handled by a coach with more than 5 years of experience in teaching.
There are different types of calisthenics classes offered in Singapore, and if you are a beginner, you should attend a class that is meant for newbies. It usually comes with either of these words: Intro, Fundamentals, Beginners, Preparatory, Foundation, Starter, etc... which means that these classes are beginner-friendly.
Some of the Calisthenics classes are named according to the skill that the class is targetted to like Handstands class, Gymnastics Rings, Planche, Muscle-ups and so on… so if you have a goal in mind, you might want to consider attending these classes but bear in mind that the level of the class may not suit you, especially if it is your first time.
If you are not sure which class to attend, it will be worth your time giving them a call first to check if it is suitable for you. Here is an article I wrote that goes in depth about the best approach for beginners to start calisthenics training.
If you want to get started with Calisthenics at home, here are some articles you that can help you get started:
How to do push-ups correctlyHere is a 5-step approach to safely and effectively learn Calisthenics training as a beginner in Singapore:
Calisthenics training is a very simple exercise where you only use your own bodyweight to increase or decrease the resistance of your exercise. It doesn't utilize a lot of equipment to complete a Calisthenics session.
With this simplicity lies a hidden complexity on the inside. You are not relying on how many plates you place on the bar, neither depending on a piece of equipment for your body alignment.
This means that you need to know how your body feels and how it is positioned in relation to your arms or legs to dial in the intensity. This will make it more complex for beginners to understand.
Going straight into the Calisthenics exercise might lead to putting too much or too little intensity that your body needs to progress. It is like going straight into the squat rack without knowing how much the bar and the plates weighed in total.
Here are two ways to develop awareness:
For example, doing a push-up exercise might be considered as only one exercise, but if you look closely, it is a combination of a plank and an arm pushing exercise.
So breaking down the push-up exercise to develop that strength needed to do a plank and doing a separate exercise to increase the pushing strength of your arms will make more sense. This will help you learn the push-up faster.
I have written a more in-depth article about how to do a push-up exercise correctly for beginners here.
These classes will teach you to be more sensitive with your body. With its softer and slower approach, it will give you time to gradually build strength and develop mindfulness with your practice which will transfer well in your Calisthenics training.
At Umove Fitness Singapore, we use our Pilates classes as preparatory training for those who are just getting started with Calisthenics training. It is best especially if you are new to exercise in general as it will help you develop good overall strength and flexibility in the body, which you will need in starting with Calisthenics. You can check more of our Pilates classes here.
Once you become more aware of your body, it is good to drill into the fundamental exercises. And you need to do these exercises correctly as this will serve as the foundation of your Calisthenics strength training.
Doing the movements in proper form will not only protect you from getting injured, but it will also help you to progress faster.
In our Calisthenics Fundamentals class, we will take you to a step-by-step approach to making sure that you learn to do the exercises correctly. We don't just do general warm-up movements just for the sake of doing them, but we develop warm-up exercises to help you tackle the basic calisthenic movements easily in the session.
Calisthenics is one of the types of training that you will get interested in after hearing from one of your friends doing some cool moves or maybe seeing a post on social media. It is very common to show off what people have learned in Calisthenics, like doing handstands or being able to do their first pull-up. This is fair enough as it is such a big achievement to celebrate.
What we have to understand is these skills will take time to learn. You will need to develop a certain amount of strength to do these movements, and your joints will take time to adapt to the loading of these new exercises that you are learning.
Failing to understand this aspect of the training will lead you to quit on the early part of your Calisthenics journey, or worse, it can lead you to get injuries when you push too hard too soon.
For example, people come to us because they want to learn to do handstands in the middle of the room. But when we ask them if they can do a regular push-up on the floor properly, most of the time, the answer is "no, I can't even do one."
You cannot expect your arms to hold your entire bodyweight up in a handstand position when you don't have enough strength to push a fraction of it from the floor.
This doesn't mean that you can't attend a handstand class if you cannot do a single push-up, there is always an easier version for you in the class, but it makes sense for you to work on your push-ups as well.
The key ingredient in reaching high-level Calisthenics training is knowing when to progress to the next exercise. Since Calisthenics exercises don't require fancy equipment, there is no difference between the set-up of a beginner exercise and a very advanced level movement.
For example, you only need the bar to do a basic pull-up, and it's the same set-up as the one-arm pull-up, which doesn't prevent a beginner from trying the other. But there is a world of difference between the two exercises. Unlike a typical gym training where even if you don't look at the numbers, you will see a huge size difference between a 20kg and a 200 kg set-up.
So there is a grey area for beginners to see between the different levels of exercises and how to progress with them. Two things will likely happen:
There are two things you need to know regarding Calisthenics progression:
a. What is the next level of exercise - knowing the variety of exercises you can do and learning which exercise comes before or after another will help you map your goals better. This will break down a long process into a series of achievable milestones for you to work on.
b. How many repetitions or how long do you need to hold before moving on to the next exercise - once you have learned the variations of the exercises, you will need to know the graduation mark in order for you to be certain that you are ready to proceed to the next level. This mark is expressed as the number of repetitions you can do a dynamic movement or how many seconds you can hold a static exercise.
It's like a test you take in your primary school, so you know you are ready to proceed to the secondary level.
Now aside from working on a series of progressions linearly in Calisthenics training, our body has more capacity than we think to progress further. So how do we tap into this potential? By working with more movement concepts.
Inspired by the training camps and workshops that we have attended from Ido Portal, we have learned that we need to stimulate our bodies organically. So instead of looking at your training as a single line that is growing in length as you progress, you think of it as a circle that is growing bigger as you train.
This part is where we get our training more enjoyable where you can move, work and play more.
Here are the common movements that we work within our Calisthenics classes or in a separate Movement class:
In simple terms, it's crawling on the floor with animal movement patterns. This type of training is not only fun but is also very challenging strength-wise and cardiovascular-wise.
This will take your pushing strength to a different level as you will expose your body to different angles of loading that will work on more muscles of the body.
In the fitness industry, we try to preserve our strength and flexibility as we know that these physical attributes will deteriorate as we age. But it is very rare for a fitness class to work on balance.
In our Calisthenics classes, instead of just resting between the sets, we will go through some balance drills to improve this. And it goes beyond just one leg standing; we work on the rails in different positions and join them together to create movement patterns to improve further.
Unless you go to a dance class, coordination training will be left out in the deepest corner of your routine until it is forgotten, especially if you are not good with it. No, we don't dance in our Calisthenics classes, but instead, we work on some coordination drills, which are more doable for most of us non-dancers.
Coordination work doesn't only make your movement better, but there have been ongoing researches that it can stimulate the brain enough that it might be used as a therapy for Dementia. Here is a study from the Cochrane Library about Dance Movement Therapy for Dementia.
Whether you like it or not, we interact with objects all the time in our daily life, and since we do, we might as well get better at it. A few examples of object manipulation are balancing objects in your hands or as simple as catching balls. This will not only improve how you walk without spilling your coffee but will also improve how you see things around you peripherally.
Like a professional football player handling a soccer ball, you may be amazed at how he juggles the ball, but we forget to admire how he sees everyone else around him while doing it.
Regardless of age, there is that child in us that would always want to play. A modified version of a Tag game or a slow-motion play-fight is good enough to stimulate this. It is fun, and it teaches us how to interact and connect with each other physically. In a world where we are getting divided more and more by monitors and mobile screens, this is even becoming more important.
If you are interested in what we teach, you can get our 3 session Introductory package to try our classes here.
]]>
Spend a few minutes of your warm-up routine to stretch the flexor, extensor, pronator, and supinator muscles of your forearm and wrist to spare you from future injuries. In simple terms, you need to stretch your wrist at multiple angles. This will prepare the muscles, tendons, and joints of your wrist for more loading in your Calisthenics exercises. Just go down onto all 4s position, and load your wrist gently while moving it in different directions to mobilize this area. Here is the list of exercises that you can do for this routine
Wrist flexion is the bending of your wrist so your fingers will go closer to your forearm. Though this movement will be seldom used directly in bodyweight exercises, except if you're learning to do the muscle-ups, it is still very important to do these variations. This will stretch the tendons of your wrist, which are perpetually tense when you are typing on the keyboard. Once these tendons are stretched, it will open up more space in your wrist joint to allow the small bones to glide freely, which will prevent impingement. Though you can do these movements in a different starting position, we will do all the variations starting on all 4s.
If you want to learn these exercises in person, you can join our Calisthenics classes in Singapore. We have our new UMove Fitness branch at Safra Club Mount Faber.
Try our 3 sessions Introductory package here.
These stretches are good enough to improve your range, but if you want to add more work onto your wrist or you may feel that you still need more work to loosen it up, then you can add circles on all of the variations above. Just simply add a circular motion with your entire body by first leaning to one side, then to the front, then to the other side, and then to the back. Continue the circular motion around 5 times, then reverse the direction.
Not necessarily. You can pick and choose which one really gives you the most challenge as that will be your limiting factor eventually. Work on that specific stretch and slowly progress from there. If you have more time, try to work on all the variations every now and then. This will always be good for your wrist. It will also serve as an assessment for you to check if your wrist is in prime condition on all angles before you start your training session.
Include this routine as your warm-up in very upper body session at least. Once you get familiar with the movements, it will not take you 5 minutes to get it done. If you are planning to learn handstands in the future, you may want to invest more time in wrist conditioning, and you have to do it almost on a daily basis, especially in the first few years of your training.
Stretching the wrist regularly is very important especially when you're most of the time on your mobile phone and keyboard. This hand position can tighten up the tendons in your hands and fingers, which can lead to a few overuse inflammation. Here is a wrist routine video you can do in the office or while working at home.
You can do 5 to 10 reps on each of the movement and hold for 5 to 10 seconds on the last repetition to stretch further. If your exercise session loads your wrist more, you may want to add a few more reps to make sure that you are properly warmed up with your wrist before you start your workout.
The short answer is yes, but you just have to be more mindful with your practice, as your injury can get irritated with some of the movement if you push too hard. You should consult a physician or your physiotherapist before going into the training. It would be even better to find a medical practitioner who also practices these exercises as they will give you better advice on how to proceed with the program.
A Pull-up exercise is a bodyweight movement where one hangs from a bar and pulls oneself up until ones' chin is over the bar. A practitioner can do it with a forward grip where the forearms are pronated, alternatively, in a reverse grip. The reverse grip version is also known as Chin-ups.
Unknown to many, the pull-up
movement doesn't only involve the arm muscles. According to "the Journal of Strength and Conditioning Research" article, which studied 7 muscles that are activated during the pull-up exercise, that the
are working to provide core stability during the movement. That is on top of the forearm-arm-shoulder complex muscles, namely;
In addition, there are more muscles in the finger-forearm-arm complex that are activated when performing the pull-up. These are;
These muscles will need to be systematically trained to avoid overstraining the other muscles that may compensate in order to perform the movement.
This is where the 3-phase pull-up training will come in. No matter which level you are in your pull-up training, you will be able to slot yourself into one of these phases.
This phase will not look anything like the pull-up exercise yet. It will consist of 3 preparatory hanging drills to strengthen your grip and shoulder muscles and develop your awareness in the shoulder blade area. This will give you a good foundation before you tackle the real pull-up exercise.
- grab the bar with your palms facing forward. This is called the prorated grip. Gradually hang loose on the bar, leaving any tension out. You should be fully relaxed, and you only need to grip the bar enough so that your fingers will not slide off.
If you don't have enough strength to hang on to the bar and the bar is too high for you, you can place a box or bench under the bar to rest your feet. This will take out some of your weight, and you will be able to hang longer.
Make sure you fully relax while hanging, and your shoulders should be touching or almost touching your ears. This indicates that you are fully relaxed at this point. One good way to relax is to take slow and deep breaths to release the tension of your body. Aim to hang for 60 seconds. If a bar is accessible to you, you can hang more frequently in a day.
- is another way to hang by engaging your shoulder muscles that pull the shoulder blades down towards your hips, also known as Scapular Depression. The main difference compared to the passive hang is you will actively pull down the whole time without trying to bend your elbow.
Your neck will look long, and your shoulders will shrug down with this hang. It will be a lot more tiring than the passive hang. If your shoulders are quite unstable or in pain, this type of hanging might be a good place to start rather than the passive hang as the engaged muscles will protect the shoulder joint.
You can then slowly shift towards passive hanging once you are getting more comfortable with your shoulders. A good aim is 30 seconds for this type of hang.
- This is the first step for your pull-up movement, so it is very important to understand this part. It is basically a combination of passive and active hang done one after another.
Start in a passive hang and pull yourself up to an active hang, but keep your elbows straight. Then lower back down to the passive hang and repeat the movement. Try to do this movement at a slow tempo, especially if your shoulders are feeling some discomfort.
You want to make sure that you have spent enough time doing the passive and active hang before attempting this drill, as this might cause some discomfort on your shoulders, especially if your shoulders are very tight or unstable. Aim to do 10-15 reps of this hanging shrugs at a comfortable intensity to show that you already have enough strength built to progress to the next level.
At the early stage of your program, you can use hanging as a stand-alone exercise, or you can use them as a warm-up or a finisher drill. If you're going to use hanging as a warm-up, make sure that you do it without causing your forearm muscles to fatigue, as this will affect your strength for your main workout.
You may hang as much as you can after your main training; this will be good for you to stretch the muscles that have been worked out.
One common question is, how do I start with pull-ups when I can't even do one? This is an easy one to answer if you understand the progressions of this exercise. It's like how to become an accountant, and I'm still 4? Just follow the right progression, it is pretty straightforward, but it will take some time and effort.
Here is how you will do it.
The Ring row is one of the key ingredients for the pull-up, especially if you are coming in with a lot to work on your strength, which is generally the case. These drills will develop your pulling strength gradually without overstraining your shoulders. It doesn't matter how weak a person is; they will always have a variation for doing Ring rows.
These ring row variations are very good to develop the muscles of your upper back, especially in between the shoulder blades that normally won't get enough work when you go straight towards doing pull-ups.
There is only 1 real variation here, but to understand it better, we will break it apart according to the intensity. You just have to understand the basic mechanics of the movement, which is, the more upright your body is, the easier the rowing exercise will be.
You can adjust the angle of your body in 2 ways; the first one is by adjusting the ring height; if you lower the ring, your body will be less upright, and it will be harder.
The second way is to move your feet in reference to where the ring is. Moving your feet backwards is easier, and moving your feet forwards will make it harder for you to do the rows.
- the real beginner movement where you will end up feeling nothing at the end of the pull, but if you are starting with a very low strength level, then this will be a good start. Grab the ring and carefully lean backwards until your body will be at an incline angle. Pull the ring to your chest and think of driving your elbows backwards as you do it.
You should be almost upright at the top of your pull; if not, adjust your feet accordingly. Then slowly go back down. If this is too easy, then you can proceed to the next progression.
- this is where most people will start. This drill is exactly the same as the previous one except that your feet are more in front this time. Or you can also lower the rings to achieve the same angle. If you find it too easy, then move your feet a few inches forward or a few inches back if it is too hard. Your body will be at an incline angle at the top of the movement.
- The hardest of the three. Once you have built a good amount of pulling strength with the ring rows, you can proceed to do the assisted pull-ups, or you can continue with your progressions with the ring rows doing this variation. The same starting position as the previous drills, except that the ring is a lot lower.
Your body will be close to horizontal at the bottom of the movement, and your shoulders will be almost touching the floor.
Aim to do 10 to 15 repetitions for 3 to 5 sets for these exercises, especially for the upright and incline row, to make sure you have built enough foundation before you proceed to the next level. Though this is not a hard and fixed rule, it is a safer one to follow.
In case you don't have access to rings, you can find a low bar in your local Calisthenics area and work on incline pull-ups AKA Australian pull-ups; the only drawback here is, as the bar's height is fixed, you will end up with a limited option to regress the level of the exercise.
This will be a challenge for real beginners with a low level of strength.
Now we proceed to the assisted pull-ups variation. Once you have spent enough time with the ring rows and have made good progress, at least towards incline rows. You can proceed with the assisted pull-ups.
This is where your movement will look like the real pull-up exercise. Here are the most common variations I teach my students to achieve their first pull-up in our Calisthenics Classes.
It is listed from easiest to the hardest variations with small steps of increment in intensity, but you can skip some of the variations if you're progressing well with your strength gains.
This is a pull-up variation where you can use your feet either by placing them on a strong elastic rubber or placing your feet on a box to assist you with your pull-up. The best way is to do it on a stall bar, as you will have options with which bar to use to accommodate your height.
I would go for the feet on a box vs using the rubber as the rubber will be limited to a certain level of assistance. The assistance will also change as the rubber shortens or lengthens. If you're using your feet on a solid surface, you can micro-adjust the assistance of your legs while doing the exercise, which makes it more convenient and will allow you to log in more repetitions which is necessary for beginners.
Start hanging on a bar with your feet on a box/bar or a stable surface. Make sure that if you stand up on the bar, your chin will be over the bar and not below it. Start the movement by pulling your shoulder blades down (scapular pull-ups), then pull yourself up by bending your elbows until your chin is over the bar.
Think of bringing your elbows down to the back when you're pulling up and keep your shoulders down, not hunched. Slowly go down with control until you end up hanging fully in a passive hang position. Then repeat the movement.
Try to follow a more vertical line with your body when you travel upwards, ending with your chin directly over the bar and not diagonally back where your chin is far away from the bar. You are pushing too much with your feet if you end up travelling backwards.
In case you can't do a good form with this movement, this might mean that it's too early for you to be on this level, and you may have to spend more time with the ring row variation. Aim to do 3 sets of 15 reps on this level.
This will be the same as the basic version, except that you will do a lock-off when you are at the top position by lifting your feet off the bar. Hold the lock-off position for at least a second and increase your holding time to around 10 seconds. Place your feet back on the bar and slowly go down. This will increase your strength in the top position, which can be very weak for beginners.
Work for up to 10 reps with this movement; unless you are holding the top for 10 seconds, you will be good enough to do around 5 repetitions.
If you have heard of jumping to a negative pull-up, this will be quite similar, but without the jump, and instead, you will do an assisted pull-up. Once you are at the top, you lift your feet off and slowly lower yourself down all the way to the passive hanging position. Replace your feet to the bar, then perform an assisted pull-up to do the next rep. Work on controlling the downward movement to around 7-10 seconds eventually.
If this version is too hard for you to do consecutive reps, then you can rest in between repetitions and gradually decrease your resting time until you can manage to do a few consecutive reps. This variation can give you quite a bit of soreness, so start with a few reps and not more than 10 reps in total for the session, then gradually progress from there.
If you have done the negative pull-ups for a 6-week training block, you should be ready to attempt to do the real pull-up movement.
Start hanging passively under the bar, then shrug down your shoulders. Then pull yourself up by bending your elbows until your chin is over the bar, then slowly come down to repeat the movement.
If it is your first time doing a pull-up, it will be good enough to do 1 rep a few times and slowly increase your repetitions. Don't get too excited about trying out too many pull-ups at this stage, as it might overstrain your shoulders or elbows.
Log in more volume on the lower level like the basic assisted pull-up version and focus on the quality of the movement. This will increase your strength endurance and will increase your pull-up reps soon.
You have 3 basic options here for a start, the prorated grip(palms facing front), the neutral(palms facing each other), and the supinated grip(palms facing back), which you can apply to all the drills. You can start with different grips starting from your basic hanging exercises.
Here is my general recommendation for the grip.
If you're using the gymnastic rings, you can work more on the neutral grip as this will transfer to either grip in terms of strength development in the arms.
If you are using a regular pull-up bar, you only have the option to do a pronated or supinated grip. I would work more on the pronated grip as this will be more natural in our natural ability to hang on to something.
The main difference between the neutral, supinated, and pronated grip is that in a supinated grip, the Biceps muscles will be working more. This grip can be stronger initially for some beginners.
The prorated grip will work mainly on the brachioradialis muscle, which is a longish muscle that pops out when you pull something with your palms facing down. The neutral grip works evenly on both muscles.
If you can spare more time and energy, then you can explore the supinated more. Be aware that the supinated grip, if done too much, may cause Golfer's elbow, which is an inflammation of the tendon on the inside of the elbows. This doesn't mean that you don't work with a supinated grip; you just need to be more careful with the progression and spend more time in each level rather than rushing to progress.
I would go for pull-ups (with a pronated grip) as it is more functional when you are going to other sports like climbing or obstacle racing. You will normally climb a ladder or a wall with a pronated forearm position, so it makes sense to work on this type of grip more.
Doing pull-ups is also safer for your elbows, as chin-ups can sometimes inflame your elbows. You still need to do chin-ups, as you want to increase the tendon's tensile strength. You just have to make sure that you don't increase either the volume or intensity too much or too soon, as this will be a good recipe for injury.
This will vary a lot depending on the starting level of the practitioner. We have to take into account their age, past experience in sports and exercise, gender, genetics, and more. I would say this ranges from 1 month to 2 years which is a very wide range.
Unfortunately, this is the case; let's look at, for example, an 18-year-old boy who is quite lean but just didn't do much upper body exercise in the past but has been doing some running here and there. It might just take him a month to get to his first pull-up.
But take a 20 kg overweight 55-year-old lady who has never been into a fitness regimen before. It may take her a very long time to achieve the first one as she will be a bit more fragile and can get easily injured if she rushes through the progression.
If you need help feel free to contact us anytime and you can always join us in our Calisthenics classes if you happen to be based in Singapore.
]]>It is a fundamental Calisthenics movement that works on your arms and back to demonstrate your pulling strength. It can be done on a high bar or a gymnastics ring, where you first hang on it and pull yourself up until your chin is over the bar/ring, then you go back down. You know you have decent pulling strength if you can do 20 pull-ups. This is one of the Calisthenics movements we aim to achieve in our Calisthenics Classes at UMove Fitness Singapore.
The pull-up exercise is present in almost every bodyweight athlete's routine. In military training, it is one of the exercises that they do to maintain and test their strength. It is a common requirement that you need to do a certain number of pull-ups to pass an Army physical training test.
Well, it gives you that assurance that you can pull yourself up in climbing walls, ladders, ropes, or other obstacles… which makes it more relevant, especially if your training is geared towards combat-oriented or going over obstacles.
But for us mere mortals, maybe it's not very functional to think of clearing an obstacle when our daily routine only requires us to sit down on the desk, carry our office bag, or a few bags of groceries here and there. Unless you need to be rescued by a flying helicopter for some reason, pulling your bodyweight up may not be that relevant, isn't it?
Well, this is true for these direct logical reasons, but doing pull-ups will give us more than what you think it does. Even if you really cannot pull your own body over the bar, you will still get many benefits from going through a pull-up routine.
You will develop muscles in your back, arms, and even abs. You will get stronger and leaner in these areas, which will give you that toned, V-shaped look. The increase of strength from your upper body will transfer well in both functional activities and other fitness routines. The hanging itself gives you the benefits of stretching multiple joints in your body.
Here is a more comprehensive list of benefits you can get from pull-up training.
Let's start from the anchor point here where you are about to start your pull, the hanging phase. Unknown to most, especially if you can't do a single pull-up at all, you think your arms and shoulders are not strong enough to do this movement. This is most likely true, but one thing you have overlooked is your grip strength. If you attempt to do a pull-up, you will start feeling that your fingers will just slowly slide off and unwrap themselves from the bar, blaming the bar because it's slippery. This is actually because of the lack of grip strength. Your fingers and forearm muscles have not developed enough strength yet to hang on the bar in the first place. This will be your first obstacle. It's like you're trying to do squats when you don't have enough strength to stand up on your own.
Train your pull-ups in the right progression, and you will improve your grip strength which will carry over to more than just climbing a flying helicopter's ladder to rescue you. Now, you will be able to carry your grocery bags more comfortably and walk with your chin up high out from the supermarket while extra tensing your toned arms to show off your lean muscles...that sounds good, right?
You have to carry your own body weight when you do a pull-up, which you will be using similar muscles of your arms and upper back when you lift something off the ground. This makes pull-up a very functional exercise that makes these challenging daily chores easier.
Unless you go crazy with pull-ups and trying to do as many reps as you can in a set. And not doing the movement in full range, which will shorten your lats muscle (the muscle that runs from your armpit to the back and sides of your torso), you will get a great benefit of a good decompression stretch from multiple joints of your body including your wrists, elbows, shoulders, and spine.
When you hang fully relaxed at the bottom position(the passive hang), you will get a good stretch on all the muscles and joints of the upper body and even in your spine.
This decompression effect of hanging will increase the space in these joints, which will keep them healthier. This will stimulate the secretion of synovial fluid inside the joint, which is responsible for keeping it supple and nourished. And it will also relax the muscles of your upper body as you keep working on the passive hang.
So make sure you do the pull-up movement in a full range where you start in a passive hang position and then pull yourself up until your chin goes over the bar. One of the best ways to optimize the benefits of hanging is by holding it for around 10 seconds on the last rep of your pull-up. It will be quite challenging at first, as you will be tired already by then, but it will teach the muscles how to relax further even in their fatigued state.
Because of convenience and accessibility, pushing exercises are done more often than pulling. You only need the floor to do push-ups and planks, but you need a sturdy bar, at least for you to do pull-ups and hang. If you look at Yoga and Pilates Mat classes, for example, since it's done on the mat, it is very unlikely that you work on your pulling strength.
These activities will get you stronger with your pushing muscles, but your pulling muscles will get left behind. This can cause a significant imbalance in the future that will lead to injuries.
Here is a beginner's guide to do pushups if you still struggle with pushups as well.
So doing pull-ups or pulling exercises is needed to create this structural balance.
If you want to work on a more balanced routine that involves your pushing and pulling strength as well as working with your core and lower body, you can join us on our Calisthenics session. We will be happy to guide you with the movement. We have a Calisthenics introductory package for 3 sessions for you to try out. This is, of course, if you are based in Singapore.
If you are just getting started with push-ups or in your Calisthenics training, and you still don’t have enough strength to do the full push-ups on the floor, you can do it in 3 simple ways:”
One of the simplest ways to modify the push-up exercise is doing it kneeling. You will shorten the leverage that you are pushing with your arms; thus, it will make it easier for you to push yourself up.
Start on all 4s position with your hands just directly under your shoulders and your knees under your hips. Bend your elbows to lower your chest down to the floor, then push yourself back up. Make sure your elbows are pointing backward and not outwards as you bend down.
If you still struggle with the kneeling version of the push-ups, you can bring your knees closer to your hands, which will shorten the leverage a bit more. The only drawback here is your form will look a little awkward as your hips will be a little higher in relation to your shoulders at the bottom of the position, and you will feel cramped up, but this will make the movement more doable for the time being.
Another way to make it easier is to go only to the lowest point you can do, which you know that you can still push back up. This way, you can maintain a good form with good control of the movement. You can place a pillow, books, or a yoga block as a point of reference for you to touch your chest onto. This will give you a consistent range to target and gauge your progress in the future.
Doing the kneeling version is great as you only need the floor to do it. The only thing that you miss if you are doing this version is the plank component of the standard push-ups which will give you a great benefit in strengthening your core muscles. Here is a post that describe more details about the plank line of the Push-up exercise.
Find a stable surface you can place your hands onto, like a table or a bench. Do your regular push-ups. If you still struggle to push yourself up, try to find a higher point you can place your hands. Once you get stronger with the current level you’re working on, find a lower level to place your hands to progress.
The basic mechanics here is that “The higher your hands are, the easier the push-ups will be.”
One best way to work on your incline push-ups is doing it on a rectangular box that has unequal dimensions on its length, width, and height. You can start on the highest point of the box, then progress to the middle height, then to the lower height.
Incline push-up is my go-to version that I teach my students in my Calisthenics classes here in Singapore as this will simulate the standard form for the push-ups, which will give us the full benefits of the exercise.
Here is a short video I created so you can understand push-ups better:
The other alternative for a beginner to work on the push-ups will be doing the negative version. In short, you just do the downward phase of the movement. You start in a high plank position, then slowly lower down until your chest is touching the floor. Then push yourself back up in any way you can manage to go back into the plank position again to start the next rep. Make sure that you go really slow when you go down, aim to do around 7 to 10 seconds to get the maximum benefit for this movement.
If you can’t lower down all the way with good control, or you are not able to lower down slow enough, you may not be ready yet, and you can choose to do the incline push-up or the kneeling version.
As a beginner, you should try to aim at doing around 10 repetitions to start with and work your way to do 15 repetitions. Do this for 3 to 5 sets. Make sure you have adequate rest between sets (around a minute or 90 seconds) and give yourself a day or two to recover from your previous session before doing your push-up routine again.
It is important for you to do more repetitions at this level as you will build a better foundation with the movement, and at the same time, you will learn faster as you are logging more repetitions of the movement.
Make sure that you are working on the right level of your push-up variation when you are doing your routine. What I mean here is, if you can do 18 on the height you have chosen for your incline push-ups, then you are shortchanging yourself with the intensity. Conversely, if you are struggling to do 5 reps, then you are pushing yourself too hard. Doing 10 reps should feel like you’re doing 80% of your max. Slowly progress your way from there.
I wouldn’t advise doing daily push-ups for beginners. Firstly, you are still learning the movement, and there might be some minor corrections that are needed to be done. Doing daily push-ups will cause you to fatigue and will most likely compromise your form further. This bad form over time can cause injury to your shoulders or elbows. Secondly, as a beginner, your recovery level is still very slow, and you may not be able to recover fully in between your daily sessions. This will lead to overtraining or just a plain loss of motivation as it will be too hard to do it consistently. You are better off doing 2-3 times per week for now. Here is a basic Calisthenics routine you can follow at home.
Another question is which version of the push-up should you be doing when you’re just getting started; the simple answer is just to work on the standard version first. Don’t overcomplicate things at this point; learn the basic movement and get stronger with it. Once you can do around 15 good repetitions on the floor, you can start exploring other variations.
If you are based in Singapore, you can join our trial package for 3 sessions here to learn more about Calisthenics.Ever wondered why you still struggle to do standard push-ups from the floor, even after months or years of attending different fitness classes? It is even more frustrating when you have been attending HIIT (High-Intensity Interval Training) classes and worked yourself so hard just to realize that you can do dozens of knee push-ups, but still find it hard to do a regular push up movement. It seems like your arms just don't have enough strength to push your weight up.
In this post, we will discuss why push-ups are essential, and we will make sure that you learn how to do it correctly, and what you should do to acquire the strength to do the standard push-ups.
There are so many new exercises popping up in the fitness industry. However, some movements were practiced long before we were born. They’re still relevant, and they will remain useful in the future. One of these exercises is the push-up. Why? Because it just works!
The 2 key points below will provide you enough insight to optimize the benefits you will get from the push-up exercise, so I suggest that you pay attention:
- the line that forms from your head to heel should be straight and rigid, so you are engaging all the muscles on your shoulders, core, and legs. Maintain this line as you lower up and down, not sagging the lower back and hips.
- bend your elbows pointing back as you go up and down. This form engages your shoulder muscles and arms best and will give you more room for progress and prevents shoulder injury in beginners.
Correctly performing the push-up exercise will make your training more effective and reduces the risk of injury. Mindful movement during the exercise will lead to safe, long-term, and sustainable progress.
So here's the big chunk of the battle. We know that the push-up has always been there, but somehow most of us really struggle to follow the correct movement. I will give you 2 parts, which consist of a few drills to tackle this issue. If you follow my advice closely, you will eventually be able to do push-ups and enjoy its benefits.
Here’s how you do it.
Almost everyone skips this part and goes straight to doing hundreds of knee or full push-ups and expects to progress. Sometimes it does work, but if you are still here with me, it either didn't work for you or would like to know a better process.
I will teach you 2 drills to help you understand the movement's starting position (the high plank) and improve your shoulders' awareness.
Exercise 1: The High Plank pelvic tiltingThe push-up starting position is a high plank (plank position on your hands with elbows straight). It makes sense to practice and strengthen it like a sprinter working on hand and foot placement on the track before exploding onto a dash.
In this drill, you'll learn how to control your tailbone/hips in a high plank position, which will engage your core and prevent your back from arching or sagging during push-ups.
Step 1: Go into a high plank position with your elbows straight, legs zipped strongly together, and your hips somewhat at the same level or a little lower than your shoulders. Keep this position rigid by engaging all muscles.
Step 2: You will then tilt your tailbone down (flatten or round your lower back) and tilt your tailbone up (arch your lower back) alternately with control while keeping the rest of the body still. You will feel a strong engagement in your core muscles when you tilt your tailbone down (tuck).
Exercise 2 The Straight arm push-ups AKA Scapular push-upsThis exercise isolates your shoulder blades and its muscles. You will get stronger and develop better awareness on your shoulders.
Step 1: Start in a high plank position with a slight tuck of your tailbone (from exercise no. 1) to fully engage your core and hip muscles. Maintain this engagement of the muscles all throughout the movement.
Step 2: Slowly bring your shoulder blades together towards the center of your spine (Sink chest downwards to the floor) without bending the elbows.
Step 3: Push yourself back up by separating your shoulder blades away from the center.
Make sure that you push your hands hard to the floor to initiate the upward movement.
Take note that your elbows are completely straight throughout this drill.
These 2 exercises can serve as your warm-up and as a finisher set at the end of the session.
Warm-up: 1 - 2 sets of 6-10 repetitions on both exercises - the goal is to learn and polish the exercises to develop more awareness on your shoulders, core, and hips. Don't fatigue yourself doing the warm-up.
Finisher set: 3 - 5 sets of 8-15 repetitions before finishing your session (optional depending on your level of fatigue). For an advanced practitioner, a finisher set means finishing off all remaining strength after doing all your main exercises.
If you teach 5-year-old math, you wouldn't want to introduce advanced algebra before basic multiplication. If you do, two things may happen that either the child will run away terrified or go crazy trying. Similarly, learning the push-up exercise, going straight into the standard push up training is a major mistake for most people who failed to achieve this fundamental skill. To progress and get stronger, you need to assess your strength level first before starting your program. Once you know your level, you will slowly work your way up the progression scale, and for sure, results will come your way.
My goal here is for you to be independent in doing this exercise, so I want you to understand the movement's mechanics. This will help you to decide on how and when you can progress.
The basic rule: the higher you place your hands, the easier it will be. You will then gradually progress to lowering your hand placement as you get stronger until you can do the standard push up from the floor. Doing this method has no limitation in terms of age and level; even a 90 year old can start with the program without overstraining. Aim to do 10 repetitions or more of the version you're working at before you progress to lower hand placement.
2 Steps approach: Assess and do the work!
Step 1 Assessing your push up strength level - Find a stable surface like a countertop, bench or an adjustable stallbar mount then try to perform push-ups as many as you can with proper form. If you can do less than 5 - go higher with your hands; if you can do more than 10 - go lower. You are on the right height if you find the 5-10 repetition level.
Step 2 Keep working at that level until you can do 3 sets of 10 repetitions consistently and then go lower.
Make sure that you are keeping your core tight by tucking your tailbone slightly throughout the movement. This will keep your form clean while you will have that extra benefit of working out with your core the whole time.
It's not complicated! Keep your practice sessions consistent, and you will be surprised at how much you can achieve.
Get a free e-book- "Beginner's programme for Calisthenics - A complete 6 weeks step-by-step guide to get you started" as a gift from us!
Here is my tip on finding the height where you can place your hands on, stack books, or yoga blocks to increase or decrease the height gradually. Be careful: Don't stack them too high as it can become unstable.
Putting it together! The basic push up routine that you can do 2-3 times a week as a stand-alone workout session or in conjunction with your fitness routine.
Warm-up:
A1 High plank pelvic tilting 1-2 sets of 6-10 reps.
A2 High plank straight arm push-ups 1-2 sets of 6-10 reps
Main work:
B Elevated hand push-ups 3-5 sets of 5-10 reps.
Ensure that you progress only to a lower height if you can do 10 reps with good form on all sets.
C1 High plank pelvic tilts 2- 5 sets of 8-15 reps.
C2 High plank straight arm push-ups 2-5 sets of 8-15 reps
C exercises are optional, depending on your energy level after all of the previous exercises.
The key thing is you progress your repetitions from here, even with just a few reps in the next session. E.g., 1st session, you did 2 sets of 6; 2nd session is 1 set of 7 and 1 set of 6.
Wrapping it up! Just to make sure you get it right.
Remember that you can't read your way into your first push up, neither can you pay somebody to do it for you; you've got to do it yourself. That makes bodyweight training skills very valuable as no matter what, only those who put effort will get it. Don't delay anymore; start your practice session now in spite of not being familiar with many exercises. If you feel too lonely doing it alone, you're welcome to join our fun group and progress together in our Calisthenics Fundamentals class.
]]>Should you do Calisthenics or Gym Workouts?
Always wondering about what may be the best workout for getting fit?
Let us help you get some clarity! Before we begin, let's list their differences:
]]>Should you do Calisthenics or Gym Workouts?
Always wondering about what may be the best workout for getting fit?
Let us help you get some clarity! Before we begin, let's list their differences:
Here, we will list various factors which many people feel matters the most, and I hope this article may help you decide for yourself too, about what works best for you.
To be fair in judging one workout method against another, we need to compare them on factors that make sense.
The following comparison points should matter the most to anyone looking to strike the right effort to returns ratio at the end of the day.
So here are some quality of life comparison points we're going to go through:
We will elaborate on all of the points mentioned above further below.
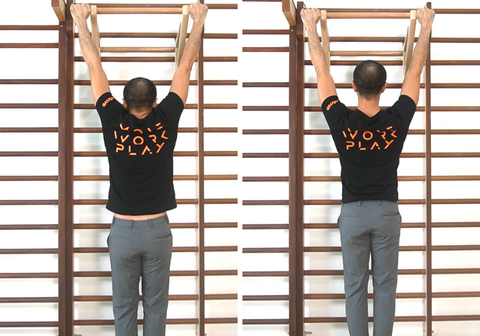
Almost all the Calisthenics exercises you can think of are compound exercises, which means you engage many muscle groups simultaneously.
Take, for example, jumping jacks, pull-ups, or push-ups. Either exercise is so much more useful for working out the whole body than a simple bicep curl, which only works the biceps.
This is because compound exercises engage more major muscle groups simultaneously, thus burning many more calories in the same amount of time spent working out.
Compound Exercises > More Muscles Used > More Calories Burnt > Weight Loss
For sure, you will be able to find compound exercises in the gym, namely the squat, bench press, and deadlift. However, adding more weight while already being overweight may put a lot of strain on the joints and potentially cause injury.
Getting injured > No more working out > No more fitness gains > Gain Weight
My opinion is that the Weight Loss category's winner should be Calisthenics, due to having more simple full-body workouts with a lower risk of injury.
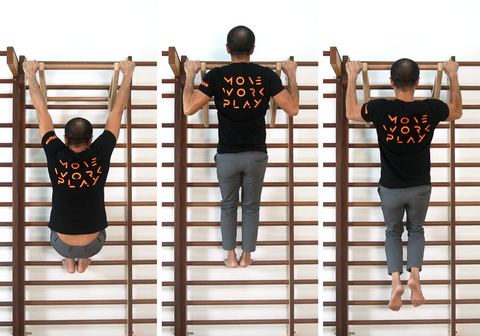
Just getting started on your fitness journey and feeling clueless?
If not, try looking at this from the lens of when you were a beginner yourself.
The gym's typical practice is to split muscle groups into 'days,' so 'Leg days,' 'Back days,' etc. Then do each of the 5 Primary Muscle groups a minimum of twice a week. That makes for a total of 10 separate workout rotations.
You won't have 10 days a week, so the practice usually involves hitting 2 major muscle groups per session.
Hence you may be in the gym for 4-5 times a week to hit every muscle group twice, even if you choose 2 major muscle groups to superset per workout session.
This is why you hear so many guys in the gym skipping 'Legs day' entirely due to lack of interest and time.
Working all parts of the body is excellent for looking aesthetically balanced and reducing our risk of injury due to muscle imbalances.
However, with Calisthenics, there's no specific 'arm,' 'legs' or 'chest' day as most exercises work the full body.
You just need to spend 3 times a week doing Calisthenics for those of you who want to stay generally fit.
Alternatively, suppose you were to hit the gym for the same results. In that case, you may have to allocate a minimum of 5 days before you get around to having every body part worked out twice a week.
For those of us on a tight schedule who want to achieve the same results for less time spent working out, we just got to stick to a well-structured yet straightforward bodyweight routine.
We will be saving so much valuable time for other things in life. Calisthenics is the way to go for Workout-Life balance!
As a beginner, you will already work out many muscle groups by merely doing anything conventional in Calisthenics.
Some running, bodyweight squats, push-ups, and pull-ups can literally become everything you need to know for starting your practice. Do those four simple exercises three to five times a week (or more) depending on how long you need recovery. There you go, you have literally the whole program settled.
Instead of doing 9 sets of three different exercises for one specific muscle group, just do push-ups and pull-ups for targeting all the major muscle groups at once! As a beginner, it's easier to practice a few significant movements with consistency instead of many complex and varied exercises per training session.
Calisthenics makes planning and learning easy. You just need to focus on the few beginner exercises, and do them correctly!
Not wanting to start your fitness journey with purchasing fancy equipment or getting locked into a costly gym membership?
Try Calisthenics out. You may wind up not spending a dime even.
Unless you've invested in a home gym, chances are you'll have to get a gym membership to do gym workouts.
I'm not sure if everyone may relate to this, but even though looking good is not a must, there's just this massive pressure for looking good. As Confucius once said "young men and women all want to look and dress nice". Ok maybe he didn't say that, but you get the idea. Our buying patterns get influenced by our environment.
I still remember how, when I was on my first job, one of the first things I had done was to immediately sign up as a member of a commercial gym.
Being completely new to the gym, I found myself noticing other members. They were all clad in fitting sportswear while I was simply wearing some dry-fit tees from a random event. I hadn't thought much of that at all.
So after going to the gym and on the way to work, I remember looking at a set of tops even when I have absolutely no need for them! Honestly, when I look back at then, it was my desire to fit in.
At some point, I had completed my gym membership and went back to mostly Calisthenics and Rock Climbing.
I found myself not caring anymore about the shirt or pants that I was wearing. It just needed to be comfortable enough to move around in.
I had no one around me in the quaint little fitness corner in my neighborhood. I remember even going topless and focusing more on just working out hard.
I never bothered to dress nice again to work out because there's no one to impress but myself in the quiet park I go to.
When you do Calisthenics, wearing anything comfortable to move in is all that you need.
Also, a good Calisthenics session may potentially involve just the ground you stand on plus some hard work.
Due to the low costs for starting the practice and free facilities, we can agree that Calisthenics is the go-to routine for those on a budget.
Even if you aren't, you can save a lot still as all you would need may be a weighted vest, pair of rings, P-Bars, and a pull-up bar at home!
Speaking of low cost, the lowest cost something can go is to be free, so remember to get a free e-book- "Beginner's programme for Calisthenics - A complete 6 weeks step-by-step guide to get you started" as a gift from us! Your free programme is right here ready for you to embark on your Calisthenics journey.
Again, another bonus for doing Calisthenics.
Take a look at this scenario for Calisthenics:
Now, this other scenario in the Gym:
These are common progressions when it comes to Calisthenics and Gym.
The workouts are getting progressed. But instead of only increasing the weight, Calisthenics also teaches us an entirely new movement on top of the push-ups we are comfortable with already.
While Gym work usually only progresses in terms of weight unless you fully substitute the workout and do other exercises.
This is why most people find that Calisthenics is much more exciting and fun than Gym Training
Calisthenics allows you to progress and grow into doing more challenging and complex movements while gym work tends to progress exercises by replicating the same actions with progressively heavier weights. It
When you begin your workouts, you may be really disciplined and excited to grind. Still, without some new challenges to confront every training, the monotony can cause people to lose interest in the workout they do.
Hence I would give Calisthenics this point as it is way less monotonous and more of a challenge that grows with your own practice.
Have we already mentioned that a good Calisthenics session may not need much to start off with?
This means that the world is your gym, work out literally anywhere! It doesn't get simpler than that.
Make it easier to stay consistent and keep the gain train chugging along non-stop.
However, over-exercising can be counter-productive with moderation in mind, so check out this Common Mistakes post for training mistakes that even the fittest people sometimes make.
It may help you to have more understanding of what may be causing your strength growth to stop.
Work out at home! In the Gym, in the Park! If you have shower facilities at work, you can consider trying this light workout- How to get started with Calisthenics? A Beginner's guide.
This point goes to Calisthenics hands down.
Functionality is simply how well the skills learned from one task can be passed on to another activity.
In Calisthenics, you would see people do workouts like sprinting, jumping, and lifting their bodies in many different ways.
A lot of the strengths and skills developed would help you be able to do various sports. The hand-eye coordination and body awareness created would extensively translate well into activities like rock climbing, running, or even navigating through rugged terrain on an outdoor hike.
The balance developed from a simple one-legged squat, for example, makes you flexible enough to do various things. Such as being able to touch your toes, squat down on two legs into an Asian squat, or simply develop power in the legs. And that is just one exercise of many.
Working out in the gym can be significant. But still, the biggest takeaway would be learning how to lift bulky items in our daily lives with good form. Which may not be a common task for most.
Most sports do not involve lifting many pounds of weights in the first place, other than weightlifting.
Only developing strength is not enough to train the finer things like technique, movement, body awareness, mobility, and proprioception. See the 7 Undeniable Benefits of Calisthenics Training! article for reference.
This point I would give to Calisthenics. But if your work involves lifting heavy items, then gym training may be much more functional to you.
Otherwise, Calisthenics carries over much better into what we do daily for the average person or athletes like myself.
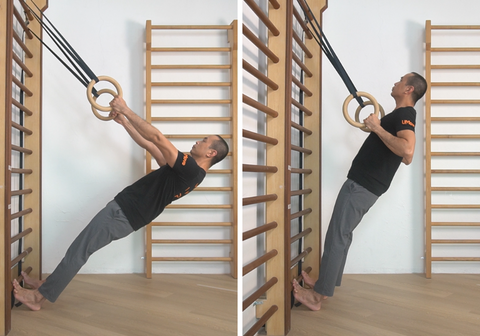
At some point in our daily grind to be at our best, we would start to wonder which discipline gets us really strong. So we will do this by comparing the transferability of each practice's strengths into another practice, e.g., Shoulder barbell press vs. handstand push-ups.
A gym-goer doing perfect-form Barbell Presses up to his bodyweight may take 2 years or maybe far longer (or sometimes never) to get a handstand push-up.
Compare this to a Calisthenics athlete who may only take 3-6 months to learn and achieve a perfect-form Barbell press of his full body weight.
This is so because of the amount of adaptable strength and skills each practice offers.
Calisthenics often trains one to be very adaptable with their strength and skills. The movements usually incorporate flexibility and multiple minor muscle groups coming in to hold one pose, for example, a handstand. While a Barbell press is much more controlled due to the stability provided by the bar or equipment.
The same can be said for the old Machines Vs. Free Weights discussion. The more freely you're able to move, the harder you work to stabilize the weight.
You will definitely have seen street workout artists looking very weightless, pulling off flows after flows of bar tricks or hand balancing moves.
Calisthenics offers more strength, which is adaptable and can be translated into other skills if needed be.
My verdict? This final point goes to Calisthenics!
In most aspects, Calisthenics has an obvious lead as compared to Gym Training.
I personally feel that it is safe, too, to say that from my experience as a competitive athlete that the practice of Calisthenics has helped my performance a lot more.
It has its uses both on-and-off-seasonal training periods,
I do lots of Calisthenics to build strength on top of regular rock climbing to give my joints and tendons a break from sports training.
That really strengthens and conditions my full body to stay in form during off-seasons, not something which the gym can really substitute completely.
I find that the addition of weights in my Calisthenics routines with a weighted vest or dip belt is the most effective for improving my regular bodyweight training.
However, I may still access the gym occasionally to use the 2 or 3-kilogram weights for shoulder conditioning, which may look bizarre to most people in the gym looking to train for mass.
After all, both forms of training are what you make of it, so utilize them to their full potential where and when you can see maximum results!
I personally will recommend it for the aspiring beginner to first try out our free routine provided in our free e-Book.
Also, consider taking a Virtual Tour of our studio online and check out some of the online classes we offer. You can literally hit the ground running with a wide range of studio classes which we offer, from Calisthenics to Pilates classes.
As with any endeavor, it is never possible to progress without putting in the effort and time. Here are the packages we offer to the first-timers of our studio.
]]>Could they have chugged protein supplements and hit the gym daily after office hours like some of us do?
Were they working out to look fit and sexy?
Or how about when it came to Calisthenics? Did our Ancestors get a...
]]>Could they have chugged protein supplements and hit the gym daily after office hours like some of us do?
Were they working out to look fit and sexy?
Or how about when it came to Calisthenics? Did our Ancestors get a smashing good time doing human flags and muscle-ups?
In this blog, all jokes aside, let me take you through how fitness was back then and how it had evolved with time.
To further illustrate the history and evolution of our Fitness Industry as a whole, we will first explore how fitness training first came to be and its adaptation into modern practice.
In the beginning, folks doing fitness didn't have much of a say on whether they liked working out as a lifestyle choice.
Working for a living mostly involved in manual labor. Wars were frequent, and training to be able-bodied was necessary or part of their livelihood.
In ancient Greece, the forms of training that people did for military purposes usually consisted of:
The training was frequently done naked for convenience. Hence it was called gymnazo, which means "to exercise naked."
This term is the origin word for Gymnastics. The place where people did their training was by association called the "gymnasium."
In ancient times, Gymnastics involved various practices. People back then did a whole range of activities, which we have discussed above, as part of this one broad practice.
All of those activities were functional for people who had to go to war. But it had since been adapted to become more than a wartime training routine.
At some point, the people who used to train hard to fight wars thought it was good to use the training as a form of friendly competition. People from all over the region could gather to display their physical prowess in honor of the Greek gods.
This meant that training did not have to be purely for war. Having peacetime competitions allowed the practices to gradually become recreational sporting activities.
I suppose they found sports fun enough as they kept playing what is later known as the Olympics, which continues to be organized to this day.
Although the event has lost its religious roots, the Games continue to be played. It is symbolic in the way it unites and allows people to strive for excellence and achievement.
With the Modern Olympics in 1896, the event slowly matured over the years and evolved to become a platform where countries set aside their differences, gather, and compete in the spirit of sportsmanship.
To make the event a multi-disciplinary competition, the different sports played started distinguishing themselves from ancient Gymnastics.
The bodyweight parts of ancient Gymnastics were assigned to Artistic Gymnastics and Rhythmic Gymnastics, in order to distinguish them from Olympic Weightlifting, Swimming, and other activities.
As a homage to the past, the places where people train eventually came to be called “Gyms.” But to train so with the root word in mind would be public indecency in today’s societal norms.
"As a means to measure strength and power, weightlifting was practiced both by the ancient Egyptian and Greek societies," states the official site of the Olympics. "It developed as an international sport primarily in the 19th century and is one of the few sports to have featured at the 1896 Athens Games."
That being said, weightlifting went on to be added to the 1896 Modern Olympic Games as a unique sport.
Around the 1970s, following the Olympics, multiple gyms were set up to ride the wave created by the people's desire to be fit, have fun, and improve themselves. This led to the rapid commercialization of fitness.
Many gyms started to sprout all over the US – and then to other parts of the world – as the identity of gym training and culture began to take shape.
Within the decade, other influences emerged that also shaped the fitness scene:
These events played a huge role in influencing people's perception of fitness. As such, most gyms started to play to these trends by:
The results were mostly successful, as you can still observe today in various gyms around you.
Ironically, the commercialization of fitness did not actually lead to more people pursuing fitness and health.
On the contrary, a larger percentage of society became even more unhealthy and obese. This is because commercialized gyms tended to focus on the physique and social status rather than functionality or health.
This is anything but subtle, especially when you consider that most marketing done by commercial gyms primarily focuses on fitness trends, celebrities, or extremely muscular people to promote their business.
"Join us to look like this!"
"We're offering this new trendy routine which everyone's into these days!"
"We have way more specialised fitness equipment than that other gym!"
The gym industry has diverted its focus from fitness and health. It instead markets any method that generates revenue.
Bodybuilding is born of concepts in chasing an idealized physique, trying to get as big as physically possible, and using whatever means necessary.
The participants frequently go on bulking stages, aiming to get their bodies as big as possible at any cost, and trying to dehydrate to look “dry” for the next physique show or photoshoot.
This body image that is far from healthy is the same image of health marketed to us by many gyms, even with the availability of better education and information in this age of information.
Why? Because it sells gym memberships and personal training packages.
People also began to view fitness as something institutionalised, which means one has to formally become part of a group or purchase a membership in order to be fit.
Essentially, the idea of going to the gym to have a proper workout traps us in the mentality that the gym is the only place for working out and that other alternatives are less effective.
Some may also be turned off by the idea of needing to sign up for a costly monthly gym membership just for the sake of looking good.
In addition, before the internet was a thing, many heavily relied on word of mouth, magazines, and the media to get information on how to get fit.
This also resulted in a lot of mixed messages and lack of clarity on what an effective workout is.
There's the following of fads, too. All these were observed in the overall gym culture, even nowadays.
Over time, we could become less motivated to work out on our own outside of the gym, as social concepts of fitness and health have become distorted.
Vanity increasingly seems to be the end goal instead of health and fitness.
From the original aim of working out to be strong and able-bodied (and look good as a result), people now tend to work out with the goal of looking as good as possible and, hopefully, be fit and healthy as a “side effect.”
Think of all the gyms you know which have adopted aerobics, yoga, kickboxing, and spinning classes. Whatever sells is simply adopted to drive up membership rates.
To date, the places where people lift weights may still be called “gyms” (from the gymnasium). Yet, the business model has significantly branched off into its own culture at this point.
"Returning to 'first principles,' we find one useful exercise more or less within reach of all, without preparation or expense. We mean walking" - The Atlantic Magazine, 2012.
I love the internet, don't you? It's how you came across us. It's how we have all this information for free, being communicated, being peer-reviewed, and cited.
The same may be said of Calisthenics, which can explain why it has been gaining traction as an ideal workout regimen compared to the more popular gym training.
Calisthenics comes from two ancient Greek words: kalos (beautiful) and sthenos (strength). This practice requires using one's body weight for resistance in order to develop athleticism, which showcases the combination of beauty (of the body as a result of the repeated exertions) and strength (power and determination grew from the practice).
The practice requires using one's body weight for resistance to develop athleticism.
The closest thing to Calisthenics that you may find in the Olympics will be Gymnastics. It requires many years of training, starting from a young age to condition the body and develops good spatial awareness.
As many may point out, Gymnastics seems similar to Calisthenics (I hear you). That's because Calisthenics may very well be your friendly, easily accessible neighborhood Gymnastics.
As much as Calisthenics’ roots are in Gymnastics, their philosophies are very very different, and akin to comparisons between racket sports.
Your Gymnastics gym may have equipment like a whole space for tumbling, with trampolines, a pommel horse, and a vault horse. All these are used to perhaps go competitive someday.
On the contrary, your typical Calisthenics practitioners would probably head over to nearby parks and fitness corners, which usually has necessary stations like pull-up bars or dip bars. They may bring along Gymnastics rings as an option.
Competitions for Calisthenics events are mostly community-funded and organised, and are not formal events in any significant games. As such, not many people train with competition in mind as Calisthenics practitioners do it to acquire new skills or get strong and fit.
Furthermore, there’s no fitness centre to subscribe to or pay for, little to no competitions to set as an end goal, and less pressure to look good and dress nice. All you do is go to a park and grind—just you and a simple plan of doing some pull-ups, pushups, and the like.
It is as real as fitness and health gets. No need to find yourself in a facility with a hundred and one equipment and learn how each one works in order to be fit.
In fact right now you can already do so! Get a free e-book- "Beginner's programme for Calisthenics - A complete 6 weeks step-by-step guide to get you started" as a gift from us!
You engage in fitness for the right goal and work on what you wish to achieve through strength, endurance, and body awareness training via Calisthenics. You also look good as a natural side effect of this practice. This makes it less of a product being sold to you and more of a personal fitness practice.
As such, it beautifully ties everything back to you having a sustainable and health-focused journey, rather than a temporary vanity project.
Do check out "Calisthenics Vs Gym Workouts: Which Is Better?" which is scheduled to be released soon, for a direct comparison between the two. You can also take a look at How to Get Started with Calisthenics to get right into it through an extremely simple, yet effective, routine.
Gymnastics may have brought forth gym culture and Calisthenics, but gym training became much more mainstream and commercial. Calisthenics became a personal practice that few people knew about.
Gym culture may have profited from fitness fads. Still, Calisthenics started turning the fitness model back into something that was more about working on yourself with what you have, instead of buying a dream.
With this, the bodyweight fitness workout started to gain enough traction for it to be incorporated into so many gym classes in the form of Bootcamp workouts with other weighted elements.
I hope you have gotten a broader perspective and appreciation of how our fitness culture came to be. With this information, you will be able to better decide on the lifestyle choices you will make for yourself in the future.
It contains all the necessary exercises which we highly recommend for beginners and, at the same time, are also a moderately good challenge for seasoned calisthenics practitioners.
]]>Done in 30 minutes! Imagine that feeling of accomplishment after your workout session. You've done something good for your body and mind, and you know you're going to get stronger as you practice regularly. Even better is that you only spend a couple of minutes doing it and need not go anywhere. Best of all, you own the exercises as you are not relying on a gym or instructor to finish your workout program!
In this post, I will take you through an easy-to-follow structure of a whole-body workout that mainly uses bodyweight exercises. It's a simple yet comprehensive guide for you to follow from start to finish. It will include warm-up, main exercises, and a simple cool-down routine, all of which will take you about 30 minutes to complete. I designed this program for you to do at home conveniently, and you won't be needing any fancy equipment to accomplish it.
Why Do Calisthenics?
In case you have not read my previous post on the "7 Undeniable Benefits of Calisthenics training," I will give you a summary here.
Calisthenics is our chosen method in building up the foundation for developing our movement practice. It is the one we also highly recommend to our serious students.
The benefits of Calisthenics training exercises are too good for us not to share with you. Through this training method:
How cool is that? I don't have to elaborate on these items to convince you that Calisthenics is right for you and that you should continue reading to know more.
Each session consists of 3 parts, each of which I will elaborate on before going to the fun part. It is essential to know why you are doing each part to perform the drills correctly and with a clear goal.
The warm-up boosts your blood circulation as it gets your heart pumping. It also helps soften your joints, increasing flexibility. The warm-up thus prepares your body well for the main exercises.
I use the warm-up in my sessions to help you better understand the movements that we're going to cover in the main exercises.
Doing this also prepares you for the new exercises you might find challenging and ensure you use the right techniques. This preparation will also make your main exercises safer and more effective.
In this main routine, your goal is to build overall strength to get started on your Calisthenics journey. If you do this session consistently, you will develop a good foundation of strength, awareness with your body, and overall endurance to progress on to the next level.
This is the best part of the session. You know you've done a fantastic job for yourself. Now, this is an excellent time to relax your mind and body with deep breathing exercises and release the tension in your muscles.
Get a free e-book- "Beginner's programme for Calisthenics - A complete 6 weeks step-by-step guide to get you started" as a gift from us!
Here comes the fun part! I suggest getting familiar with the exercises in your first session. Do them correctly and take notes in your exercise notebook, which I highly recommend. It is a tool that you can refer to quickly in future sessions.
I have put together an easy-to-follow routine featuring common exercises familiar to you. I will briefly describe the movements, as I don't have enough space in this post to discuss them in-depth. We will reserve that for another post, or you can always attend the session in the studio. We will be happy to teach you the exercises.
You'll need these items for your session:
Do one round of all the exercises from steps 1 to 6. Take it easy; it's just a warm-up. All exercises are done standing, so get up and let's get started!
I'm giving you 5 movements here, from A to E. Do these with minimal rest in between. Rest for 60 seconds after exercise E, then repeat the whole round from A to E.
Aim for 1 to 2 rounds first and work your way up to 5 rounds. Remember, quality sets are always better than quantity, so start easy.
Follow the version that allows you to push up around 8-10 times in good form. You can position your hands on a bench or table to make it easier. The higher your hands are, the easier it will be.
Start with one leg in front and one leg behind. The front foot should be flat on the floor, and the back foot is on its toes. Lower yourself down in a squat position by bending the front leg while keeping the back leg relatively straight. Come back up to your starting position. Do this 5 times on each side. Finish the repetitions on one side before changing sides.
Start in a plank position, keeping the whole body rigid. Bring one knee as close as possible to your nose, then bring it back to starting position. Repeat this with the other leg. Do this 5 times per leg.
Stand with one foot in front and the other around 1 to 2 feet behind, with most of your weight on the front foot. Bend from the hips while keeping the spine rigid. Finish the 5 repetitions on one side before doing this again 5 times on the other side.
There are 4 positions for this exercise, as listed below. Hold each position for 5 seconds before moving to the next.
Roll like a log starting from the first position and Hold for 5 seconds, pausing on every position till you reach the fourth position. Then repeat the process but in the other direction. Try to do this movement without letting your arms and legs touch the floor as far as possible. Do this exercise 2 times per direction.
If you're still with me at this point, then you're really close to getting started! Here are some bonus tips for you to achieve your fitness goals without a hitch:
Reading is one thing, and doing it is another. You can read 20 books about swimming, but it will never replace your first experience in the pool where you ended up drinking lots of chlorinated water. So take action now! Even just familiarizing with the movements is good enough.
I hope you have learned something from my post. If you find it helpful, please share this with your family and friends who are keen to start with Calisthenics like you! Leave a comment, give feedback, or even a smiley on the comment section below – it will surely make my day.
See you in my next post!
]]>Have you been training for a few months or years and still haven't seen any results? Are you bouncing in and out of your fitness routine due to recurring injuries? Or are you just getting started and want to make sure your Calisthenics journey goes as smoothly as possible?
If you have answered “yes” to at least one of the questions above, then this post will be useful for you.
Calisthenics is a method of strength training that mostly utilizes our own weight to get stronger. We do it because this type of training is very effective and produces fast results – even better than the traditional gym training session! Then there's the fact that it is also very enjoyable, which is always a welcome bonus.
Here is my blog on "The 7 Undeniable Benefits of Calisthenics Training!" to read more about it.
As with any other training program, there are simple guidelines that we need to follow to benefit more from Calisthenics training. Failing to follow these guidelines will slow down your progress or, worse, get you injured. You will end up sitting at home watching TV instead of enjoying your training session with your buddies at your favorite gym. This can be very demotivating and can be one reason someone will quit their workout routine.
Before the problem gets worse, you want to make sure you address them right away. One of the best ways to do this is to listen to your body and be aware of how it is doing. Noticing these subtle signals is essential in optimizing your training's benefits and avoiding injuries in the future.
That being said, here are the warning signs that you should look out for:
If you train your body, it should naturally show some progress over time. The improvement may vary between individuals, but a good rule of thumb is that if you are doing a routine regularly for 6 weeks and you are not getting any signs of progress in your strength, then you should closely re-examine your program.
Every time you work out, you challenge your immune system's capacity to protect your body from stress. Over time, your body's system will get better at coping with these challenges, but it could fail if you push it too hard.
This includes pain on the wrist, elbows, shoulders back, and etc. Minor soreness and discomfort are common in training, but take note of whether it appears regularly or lasts longer than you think it should.
Or you're getting worse even though you have been doing it for a while.
Are you experiencing one or more signs from the list above? If that's the case, you may be doing one or more of those mentioned below, so pay more attention.
This may sound counter-intuitive, especially if you have gone by the "no pain no gain" fitness motto since forever. It has its uses, but it doesn't work most of the time. In most cases, pushing too hard in every training session will result in injuries or slow progress.
How to avoid this? I recommend limiting it to once a week of hard intensity training. Keep the rest of the training days easy and work on your form. Just keep it at a good pace.
Your body can only handle so much for recovery. If you don't give it a chance to recover properly, it won't be able to deliver what you're asking for. You are likely to run into some painful joints soon.
The frequency of your training sessions should vary, depending on the type of program you are following and the level you're at in your practice. For example, training more than 3 times per week will be too much for a beginner, but 2 times per day for a seasoned athlete will be sufficient.
How to avoid this? If you are just getting started with Calisthenics, twice per week will be a good pace. Slowly increase your weekly sessions as you get better. Listen to your body and rest when needed.
For advanced practitioners, the frequency may vary. If you have been logging your training, this is a good time to check and see which training frequency gives you the best result.
In contrast with #2, not doing enough training sessions per week will result in slow to no progress at all. Your body is in continuous learning and adapting state when you're training. As such, you need the right frequency for your body to improve.
How to avoid this? Plan your weekly schedule and commit to it. An excellent way to increase your weekly training sessions is to find a training partner who can hold you accountable to your commitment.
Good things take time. In this day and age, when everything is fast and immediate, we are beginning to lose that patience needed to achieve goals that really take time. Working with our body is not a short-term commitment, and results will not come quickly.
How to avoid this? Write down your goals and think of the long term. It helps if you understand the fact that you are in this fitness journey for a lifetime. Find an advanced Calisthenics or fitness practitioner and get to know them. It will give you a better understanding of the importance of the length of time involved in the process.
This is obvious, isn't it? Despite this, advanced practitioners can still make this mistake in their training. You could find yourself in this pitfall when, for example, you are in a rush to finish your sessions, are carried away with the pressure from your training buddies cheering on you to do more repetitions, or you are just not concentrating enough.
Paying attention to your exercise form will engage the right muscles, which means you get stronger faster, learn skills easier, and have a lower risk of injury.
How to avoid this? Be attentive to your practice in your next session. You can also have someone qualified to look at you or take a video of yourself doing the exercises and check on how you can improve your execution.
Too much, too soon is one of the most common mistakes. This can happen when you're hyped with excitement and fiery motivation, especially if you have just unlocked a new skill. However, achieving your first pull up doesn't mean you can immediately add a lot of it to your training routine.
How to avoid this? Stick with your current program and don't change it. Your current program should give you more results if you stick with it.
7. Not having enough guidance
Yes, Calisthenics can be done on your own without a problem, but this depends on your background and your capacity to assess your own execution and long term planning. You don't have to hire a personal trainer or even attend a group class to get the right guidance. Even a simple online course with proper planning will be enough for you to follow for some time. This will save you lots of time waiting for your progress to come. Sometimes, it will even save you a visit to a physiotherapist clinic to rehabilitate an injury.
How to avoid this? If you are serious, finding a good coach or teacher will mitigate all the common mistakes on this list. It may be pricey at the initial stage, but it will be worth it in the long run. If I am going to go 20 years back, this is one piece of advice I would give myself.
Suppose you are serious about achieving your goals. In that case, you have to restructure your lifestyle holistically to get your desired results.
It is good for you to understand that your gains are not happening during the workout session itself. It is what you eat afterward and how restful your sleep is that will determine how much progress you will make in the long run.
How to avoid this? A healthy and balanced diet with less processed food, as well as good sleeping habits, will complement your training routine and prevent potential injuries due to overtraining.
Get a free e-book - "Beginner's Program for Calisthenics - A Complete 6 weeks step-by-step guide to get you started" as a gift from us!
To better understand the correlation between the signs and the possible mistakes in training, I've put everything in list format below:
Here's how I would summarize it:
I hope you have learned something from my post. If you found these tips helpful, please share this with your family and friends! Do leave a comment, give feedback, or even a smiley in the comment section below – it will certainly make my day.
See you in my next post!
]]>Have you ever wondered why the best athletes and military personnel still have to do Calisthenics Strength training in their daily routine?
In this post, I will share the benefits of this method with you and why our team puts a lot of energy into this training method over other disciplines.
Calisthenics training is one of the simplest forms of exercise you can find. It requires very little equipment to do a full-body workout. All you need is to have a positive mindset and regularly attend your sessions to achieve your desired fitness goals.
It is a system of strength training where you use your own weight as resistance for your exercises. You can consider static running, jumping jacks, push-ups, and pull-ups as a starting point in its basic form.
You will then progress towards more complex and physically-demanding gymnastic types of movement as you get better.
Calisthenics training, also known as Bodyweight training, has been practiced by many great athletes and warriors long way back before the word ‘fitness’ was popularized.
It is not because they lacked the exercise equipment back then. It is because the method is surprisingly simple and yet very effective.
This is one of the main reasons why Calisthenics training is the mainstay exercise regimen in military training. The convenience of being able to practice it anywhere and with the exercises being easily adapted has attracted more practitioners from other disciplines as well.
People are coming to realize that this training method is easily as effective as and even more fun than a typical gym training session.
The good news is, you can start with calisthenics training even if you're a beginner with a lower starting level of fitness. Whether you are in your mid-60s or struggling with kneeling push-ups, you can still achieve a high fitness level with determination and consistency in your personal practice.
Calisthenics exercises cover a wide variety of movements. Thus, it also provides a wide variety of benefits too.
I have listed the 7 most important benefits of Calisthenics training. You will realize why we highly recommend this method to you for achieving your goal towards movement freedom.
In my opinion, this is a significant benefit. It is also a skill that everyone should work on. Because of this training method's minimalist approach, you can do your sessions with fewer distractions without relying on numerous fitness equipment.
You will, instead, start to develop an awareness of your body positioning and posture. As you do the movements, you begin to understand your body a lot better.
By consistently honing and improving your bodily awareness, you will prevent potential injuries, and you will learn new movements faster.
You will soon notice that you are getting stronger after a few regular sessions and that you can move your body with greater ease.
This fact might already be obvious for some. However, most fitness enthusiasts still believe that lifting weights is way better for building strength.
Even though Calisthenics exercises only require you to lift your body weight, it is actually very physically demanding strength-wise. If done with the right guidance, you can achieve an insane level of strength with Calisthenics.
Get a free e-book- "Beginner's programme for Calisthenics - A complete 6 weeks step-by-step guide to get you started" as a gift from us!
Since you are not artificially carrying any weight to build your muscles as bodybuilders do, you will gain muscles from comfortably carrying your own body weight. Hence, you can get stronger by the session without getting too bulky.
Think of a monkey that will never get too big with its arms, even if it is hanging on trees all day. Despite being lean, monkeys are still crazy strong. I guess the result might be different if the monkey carries dumbbells and does bodybuilding.
In Calisthenics, you will build a nicely-proportioned and healthy-looking body.
You will get that "beach body look." Plus, you will have great flexibility to do many of the fun things you enjoy doing.
With good form, you can achieve a healthy level of flexibility in Calisthenics, aside from getting stronger. Our sessions incorporate a beneficial type of bodyweight stretching that will also strengthen your muscles whilst increasing their flexibility simultaneously. This will make your body more resilient to injuries.
All of us know that what a gymnast mostly does is bodyweight strength training and stretching. And we would all agree that they are among the most flexible and strongest athletes to be found.
One of the best things with the Bodyweight Strength Training method is in its simplicity.
Sometimes, when I am stuck at home, I am not worried because I will only need a small space on the floor and a wall to do my workouts.
Of course, you can do better with equipment like the Gymnastic rings and P-bars -which we use in the studio to optimize our attendees' gains. However, you can easily do without these and still have a very productive workout session.
This benefit goes along with #5. Since you don't need fancy equipment to get you going with your Calisthenics exercises, you can have more consistency in your training session.
And that is the most important key in achieving your goals. Whether you are at home, on a 2-week holiday, or if you simply just can't get out of the office, you can still fit in a couple of Calisthenics exercises during your breaks. The convenience alone makes Calisthenics a very effective method for consistent progress.
I must admit that I got attracted to Calisthenics from jaw-dropping videos on social media. I can still vividly remember thinking, "how I wish I could do handstands anytime in front of my school friends."
It was a big deal for me as I was never really good at sports when I was younger. Achieving these skills after 40 is such a big confidence booster for me to keep going on my fitness journey.
Though I had started with being relatively superficial with Calisthenics, it became a valuable starting point to continue onwards with this practical and functional exercise method.
So there you go with the benefits of the Calisthenics routine. Keep this list in mind before you start your training session and ask yourself if you will be working on them. It is an excellent reminder to optimize the benefits you will reap from your effort.
Now that you know how good Bodyweight training is, all you need to do is to get started. As simple as it sounds, you can actually start now simply by doing 20 jumping jacks and 10 push-ups.
A gentle reminder here, you always have two options in any situation;
Just get your body to do something, you will feel really good and then go on to aim to do better in your next sessions.
And of course, the same with any other practice, the right guidance will be invaluable for your success and safety. It will save you valuable time looking around for suitable exercises for your level. And you don't have to waste your energy on doing random exercises whilst wondering whether you are doing them correctly.
You are very welcome to join us, to have fun, and achieve your results faster by coming in to our studio classes. One additional bonus that you get right away in doing Calisthenics is the community you get to join.
It is full of fun-loving, competitive, yet exceptionally supportive individuals that you can find in the fitness community.
If you are based in Singapore, you can visit us in our studio. You will realize right away how comfortable it is to join our community of practitioners. Whether you just got started practicing or are already doing the advanced level of movement, you will feel at ease joining our sessions.
If you are interested in getting started with Calisthenics, read my post on "How to get started with Calisthenics? A Beginner's Guide" It will take you there. It comes with a simple yet effective program that you can follow at the convenience of your home, office, in the Gym, or when you are on holiday.
Please share this post with your friends, leave a comment below and drop us a mail if you have any suggestions on a topic that you want me to share with you in the next blog post.
]]>